Recently, I’ve been catching up on some journal reading and came across an ergonomics article in an online plastic surgery journal that I wanted to share.
Painful body areas in the study of surgeons. Look familiar? Neck, back, and shoulders are common areas for spay neuter vets to experience pain as well.
Stretches for Surgeons
What I liked about the article, though, was that it published a supplemental set of videos of one of the authors’ consultations with a physical therapist. The physical therapist offers exercises and stretches to counteract common surgical postures. The videos are available along with the article (and are slow to load, but be patient). Video 1, video 2, and video 3 are all recordings of this consultation, while the final video shows the surgeon by himself, performing each of the exercises from the consultation in the first 3 videos. The final video goes too fast for viewers to follow along while doing the exercises themselves so works better as a reference than as an accompaniment to exercise.
These videos offer something specific that I hadn’t seen before and that I have wished I could share with others: stretches and exercises targeted for surgeons. (Maybe this exists somewhere but I haven’t come across it yet). I’m curious totry some and if they help relieve some neck/shoulder/upper back tension.
It would be even more exciting if the study had actually tested the stretches and exercises to determine if the surgeons were more comfortable or more flexible after using them for a time. But they didn’t, so as it is we’re left with recommendations based off the physical therapists’ “standard practice algorithms” for addressing the surgeons’ complaints.
Limitations
The study had other limitations besides not having tested the exercises on surgeons. The study design isn’t optimal: the sample size is limited, and the authors didn’t use a validated musculoskeletal discomfort questionnaire. The participants’ surgical posture self-assessment was also problematic. After watching a 2-minute video, the participants were asked to judge deficiencies in their own surgical posture based on their ability to complete the stretches and range of motion activities in the video. They didn’t have the chance to view video of themselves at work or to have any assessment by an ergonomist or physical therapist, so I’m skeptical of that measure’s validity.
Despite the article’s shortcomings as a scientific study, I think that the exercises suggested in the videos could be a good resource or starting point for surgeons experiencing discomfort and for those trying to avoid it. Let me know if any of these work for you, or if there are any other exercises or stretches that work better.
Meanwhile
Today we had the chance to fire up the Hartland Community Oven which was built in our town during the pandemic. Tina was on the oven committee (she helped build it, too) so she has been through several firings in 2020 and 2021, but this is only my second time baking in the oven. Despite a sometimes windy, sleety afternoon, we spent a few hours out there baking different things as the oven went from really hot to only sort of hot. Everything looks and tastes great and I think I’m done cooking for the week! (well, maybe).
The need to lift dogs is common in small animal clinics. What are some ways that we can make lifting easier and less challenging on our bodies?
In the previous post we talked about some basic principles of lifting and carrying. Today we’ll expand on those ideas look at lifting large dogs.
Workers restrain a standing dog. This restraint posture (one leg kneeling and the other bent) could also be used to lift this dog.
The need to lift dogs is common in any small animal clinic, especially in HQHVSN. The dogs we lift may be awake, sedated, or fully anesthetized, and each type of lift comes with its own challenge. Awake dogs may resist handling and wiggle, while anesthetized or heavily sedated dogs may be loose and floppy and difficult to grip.
What are some ways that we can make lifting easier and less challenging on our bodies?
Standing or Lying Down?
Remember that the height of the lift is a factor in the lift’s difficulty. It’s easier (ergonomically) to lift a standing dog than one who is lying down. (It may not be easier overall if the dog wiggles or resists). The standing dog’s center of mass is higher than the ground and already closer to the lifted position. This means you don’t have to lift that center of mass all the way from the floor to your waist height or to a table.
Lifting a standing dog requires less bending and less muscle effort than lifting a dog who is lying down.
Back, Hips, or Knees?
When lifting from the floor, workers may bend at the knees, hips, or back, or a combination of all three. Generally, we are told to “lift with your legs not your back.” And to some extent this is true: repeated, extreme flexion of the back puts much of the strain of the lift on the vertebral joint end plates. End plate damage may be one of the causes of chronic low back pain.
In the first picture, workers bend at the knees and hips to lift an anesthetized dog from the floor. In the second picture, workers bend at the hips with a slight knee bend and lumbar flexion.
However, the recommendation to avoid any lumbar flexion during lifting is not supported by research. It’s definitely best to avoid extreme lumbar flexion (60o or more), but it is OK to flex the back along with the hips and knees when lifting.
In the end, the best means of lifting probably involves moderate flexion of the knees, hips, and lower back. The “best” way to lift will vary depending on the specific task and the individual’s strength and pre-existing pain.
Not so good: Here the worker in magenta scrubs is bending mostly with her back rather than with her hips or knees. This lift will put unnecessary strain on her lower back. Also her hold on the dog’s stifle (knee) will not lead to a secure hold once the dog’s feet are off the ground.
Two Person Lifting
The workers are facing the same direction and will coordinate their movements through the clinic.
When lifting as a team, both team members must communicate clearly with each other. Both team members need to know where to position themselves, when to begin lifting, and where to carry the dog. For example, if a dog is to be lifted onto a table, it is important that both lifters know which way the dog should be facing on the table before they position themselves for the lift.
Use simple technology to help
Use technology for your lift! If you need to move a large sedated dog who can’t walk, consider using a stretcher or cart.
Our worker in the previous post used technology (a hand truck) to help transport a cardboard box. Likewise, we can use technology to help move our anesthetized dog. Stretchers and wheeled carts are both useful ways to turn a floppy, hard-to-grip load into a rigid load with handles.
Similarly, lowering a hydraulic table decreases the height of the lift, thereby decreasing its difficulty.
Lifting a dog from the floor to a table is hard, but lowering the table turns a 3 foot lift into an 8 inch lift and requires less effort.
Meanwhile…
I hope you all are staying safe and well. Here, spay neuter clinics go on even as we find ourselves dodging COVID and mud season simultaneously, just as we have the past two years. I feel lucky for the flexibility and adaptability of my vet techs and clinic hosts as we still manage to get those cats spayed before kitten season hits. Thanks y’all!
Let’s start with some ergonomics fundamentals: lifting and carrying. This post shares some basic concepts that we’ll be able to apply later to specific veterinary activities like lifting and carrying dogs.
This will be the first in a series of posts about ergonomics in the veterinary clinic–and everywhere else. It’s been a long pandemic, but in the past half-year I’ve had a couple of opportunities to talk about veterinary tasks aside from surgery. Today’s slushy snowstorm seems like a good time to share some of the illustrations and ideas from these presentations.
March “snowstorm” with Spaymobile in background
Lifting and Carrying: the fundamentals
Let’s start with some ergonomics fundamentals: lifting and carrying. This post shares some basic concepts that we’ll be able to apply later to specific veterinary activities like lifting and carrying dogs.
First, what are the characteristics of a lifting task that can make it more or less hazardous?
Weight of load
Distance of your hands from your lower back
Height of lift (From floor or from above knee height? How high do you need to lift?)
Twisting and side bending
Working in a restricted space
Good grip, or irregular, bulky, floppy, unpredictable load
Flooring condition (dry, clean, good condition, or wet or uneven)
Communication and coordination when lifting as a team
Carrying an object close to the body and near waist height
For our lifting and carrying example, we’ll use the ubiquitous brown cardboard box. In the first illustration, the lifter is carrying a box near her body and near waist height. This puts the object close to her center of mass and puts the least amount of strain on her body. It makes intuitive sense to us that she would carry the box this way instead of carrying it with her arms extended, far away from her body and her center of mass.
In this next set of illustrations, it looks a bit strange to carry the box with extended arms. But when the worker is carrying a larger box of the same weight, she is essentially doing just that– carrying the weight further from her center of mass and putting more strain on her back. A bulky object’s center of mass is further from the worker’s center of mass, meaning that even if this object is the same weight as the first box, it puts more strain on the worker’s back. The increased strain is due to the leverage created by the weight’s greater distance from the worker’s core.
While carrying a box far from the body looks strange, it’s the same strain as carrying a big box of the same weight.
(Want to learn more about how lifting strain increases depending on the size, shape, and weight of the object and the height of the lift? Check out the NIOSH Lifting Equation.)
Another circumstance where the worker might be holding an object far from her center of mass is when obstructions in the environment require her to do so. Removing objects that obstruct work areas (such as boxes obstructing a countertop) may seem obvious but it can also be the “low hanging fruit” when making ergonomic improvements.
In the first illustration, the worker has to extend her arms to place the object on the counter. In the second, the obstructions are removed and she can place the object without extending her arms as far.
Yet another reason for carrying a weight far from one’s body because it the load is smelly, damp, messy, or covered in some bodily fluid– but the same principles apply. If it’s a soiled but lightweight cat carrier, it makes sense to hold it at arm’s length on the way to the wash area. But if it’s a whole load of smelly laundry or a patient covered in pee, using a protective barrier (plastic bag or clean towel) and holding the weight close to the body is a better choice because it allows for a more secure hold and less strain on the lower back.
Lifting below the knees or above the shoulders adds additional strain.
Lifting or placing objects below the knees or above the shoulders also adds additional strain on the worker’s body. Low placement may put strain on knees and lower back, while high placement can strain shoulders and arms (and introduce the risk of the object falling). Heavy items that need to be lifted and carried (cases of wet food; trays of instrument packs) should be near waist level to reduce the strain of lifting them. Lightweight objects can be placed on high shelves, with the bottom shelves reserved for heavier objects that will be transported with mechanical help like a wheeled cart or items that are used less often.
A worker uses a hand truck/ a dolly/ a trolley/ a two-wheeled cart to transport a large box. (Nomenclature for this device varies a lot as you can hear in this link)
Mechanical help can be an excellent way to reduce strain when transporting objects. Gurneys, hand trucks, carts, and other devices bear the weight of the load, freeing the worker from the heavy lift.
Next time we’ll talk about the ergonomics of lifting and carrying dogs– stay tuned!
For the spay-neuter vet, pandemic social distancing has been a slow time. I’ve had plenty of opportunity to stay home sleeping, baking, playing Pokemon Go and watching birds (often these two are simultaneous activities), eating fiddleheads, and seeing spring unfurl. With services starting to reopen, I’m getting ready to go back to work on Monday, so my thoughts have started to turn back to surgery and ergonomics.
During these idle months I’ve had some time to look through old ergonomics articles and projects with an eye to assembling them into something useful. This week I found myself thinking about needle holder grasps (after a Facebook conversation) and thought to look back at my masters thesis in ergonomics. The topic was a comparison between palm grasp and tripod (fingers in the rings) grasp for needle holders. The aim was to compare users of the two techniques both by surveying them about pain and by measuring the muscular strain in their forearms. In keeping with my desire to share incidental and independent research results, I’m publishing the thesis at the bottom of this blog post (never fear, we were limited to 5000 words).
If you thought this article would answer the question of whether palm grasp is better than placing fingers in the rings of the instrument, think again! The utter messiness of the results and the difficulty of drawing conclusions about the different grasp types was why I never published it anywhere (until now! here!). But I learned a lot from the research about individual variability and the diversity of supposedly standardized techniques. This paragraph taken from the Discussion sums up what I learned:
The amount of grasp diversity between participants, the use of non-standard instrument grasps, and the variability in individual participants’ grasps, were surprising findings in the current study. Participants were often unaware of the grasp that they used. Several described themselves using a grasp different from the one that they actually used, and some noticed in the midst of the experiment that they were using a different grasp from what they had described. Even within a single grasp type, the participants varied in their movement patterns and degrees of forearm rotation and wrist angulation.
So while I can’t promise any groundbreaking information about which grasp style is ergonomically superior, I do think there are some interesting photos and tidbits in this article. I also think that the diversity of successful techniques leaves clear opportunity for individuals to modify their grasping and suturing technique if and when it becomes painful or problematic for them.
I hope you all are well, and staying safe. Enjoy!
Electromyographic analysis of needle-holder grasps used while suturing
A thesis in partial fulfillment of Masters of Science in Health Ergonomics, University of Derby, February, 2015
Abstract
The current study examined variations in muscular force and muscle use patterns between surgeons using different grasps while suturing. Fourteen (4 male, 10 female) right-handed veterinarians were recruited into one of two groups, palm or tripod, depending on their usual, preferred needle holder grasp. Participants completed the Cornell Musculoskeletal Discomfort Questionnaire (CMDQ) and the Cornell Hand Discomfort Questionnaire (CHDQ), and then performed a suturing task using their preferred grasp. Four muscles in the right forearm region were selected for electromyographic (EMG) recording: extensor digitorum communis (EDC), flexor carpi radialis (FCR), flexor carpi ulnaris (FCU) and abductor pollicis longus/ extensor pollicis brevis (APL).
The 1-week period prevalence of MSD was 92.9%, with 13 of 14 participants reporting pain. Of these, 7 (50%) reported hand pain, and 12 (85.7%) reported body pain. Observed grasps differed from those reported by participants, with five using exclusively tripod grasp with the thumb and ring finger in the instrument rings, two using a modified tripod grasp with thumb and middle finger, three using palm grasp for suture placement and tripod grasp during needle extraction and knot tying, three using palm grasp with no fingers in the instrument rings, and one using palm grasp with the ring finger in one instrument ring. The static load (10th% APDF) on each of the four muscles ranged from 0.9 to 10% MVC, with greater mean values for the extensor EDC than for the flexors FCR and FCU. Degrees of forearm pronation and supination ranged from 80 to 180 degrees, and degree of rotation was positively correlated with the total pain score. Future investigation into the characteristics and benefits of various grasps is warranted, so that practical advice on reducing strain and MSD risk can be offered to surgeons.
Introduction
High-volume spay-neuter is a growing practice area in veterinary medicine in the US (Looney et al., 2008) in which veterinarians may perform over 30 surgical procedures daily, and some individuals spend over 35 hours each week performing surgery (White, 2013). These procedures are of limited variety compared with general surgery, and frequently involve static postures and repetitive manual tasks. Repetitive work is associated with increases in upper limb discomfort, tendinitis, and carpal tunnel syndrome in people who engage in manual work (Latko et al., 1999), and static postures, or isometric positions where little movement takes place, multiply the risk for musculoskeletal disorders attributable to those postures (Esser et al., 2007). While work in high volume spay-neuter has many qualities that would appear to put veterinarians at risk for MSD, there is limited research on the effects of this repetitive surgical workload on veterinarians, and no research exploring ways to mitigate these effects.
A single cross-sectional study (White, 2013) has investigated musculoskeletal discomfort (MSD) in veterinarians working in high-volume spay-neuter. The one-month period prevalence of MSD was 99.1%, with 76.7% experiencing hand or wrist pain and 98.2% experiencing body pain. Hand discomfort was most commonly reported in the right thumb and/or thumb base (49.8%) and the right wrist (37.9%). This rate of hand/wrist discomfort is 1.5 to 2 times the prevalence of upper limb MSD experienced by veterinarians in general practice (Kozak et al., 2014; Scuffham et al., 2010; Smith et al., 2009), and greater than the prevalence in surgeons in human surgical practice (Adams et al., 2013; Soueid et al., 2010). Body discomfort in spay-neuter veterinarians was most commonly reported in the lower back (76.7%), shoulders (72.6%), and neck (71.7%). Three-quarters of veterinarians experiencing hand, finger, and thumb MSD attributed their MSD completely to their work in spay-neuter. Increasing career length, increasing weekly hours in surgery and decreasing job satisfaction were the work-related factors with the greatest relative contribution accounting for variation in hand pain severity and total pain. While 94.4% of respondents felt that posture and positioning during surgery is important, only 30.6% had received any instruction in posture, positioning, or ergonomics in surgery (White, 2013).
The high prevalence of upper limb MSD in spay-neuter veterinarians may be related to the high volume and limited variety of surgical tasks undertaken, and thus the repetition of a limited diversity of hand movement patterns performed in the workday. Anecdotally, some spay-neuter veterinarians have attributed their lack of upper limb MSD to their use of a palm grasp when using needle holders, instead placing their fingers in the instrument rings.
Textbooks and authors vary in their use of terms to describe instrument grip. Anderson and Romfh (1980) describe the “palmed grip” in which the surgeon grips a long needle holder by the shanks, away from the finger rings and ratchet, making it impossible to open or close the ratchet while using this grip. This is in contrast to Seki’s (1988) diagram of “grip 2,” in which the finger rings and ratchet are held in the palm of the hand, allowing operation of the ratchet mechanism. This is the same as the “modified thenar eminence grip” described by Toombs and Bauer (1993), and also described (though unnamed), two decades earlier (Weiss, 1973). More recent sources (Kirpensteijn & Klein, 2006; Yoon & Mann, 2011) name this same grasp the “palm grip.” Yoon and Mann (2011) use the term “thenar eminence grip” to describe a grasp in which the needle holder is grasped in the palm, with the tip of the ring finger placed through one finger ring. The same grasp is elsewhere called the “thenar grip” (Anderson & Romfh, 1980). Booth (2013) repeats the descriptions and terms used by Anderson and Romfh (1980), except that, in the illustration of Booth’s “thenar grip,” the fourth finger does not enter the finger ring, making this “thenar grip” resemble the “palm grip” described above.
Current consensus appears to favor “palm grip” to describe the grasp in which the finger rings and ratchet are held in the palm, with no fingers in the finger rings. The comparison grip, utilizing thumb and ring finger in the instrument rings, has been called the three point grip (Kirpensteijn & Klein, 2006), the thumb-ring finger grip (Anderson & Romfh, 1980), the thumb-third finger grip (Toombs & Bauer, 1993) [this grip is pictured with the fourth phalanx in the instrument ring, despite the use of “third finger” in the name], and thumb-ring finger (tripod) grip (Booth, 2013). For the current study, the term “tripod grip” has been chosen for its brevity and clarity.
The research comparing the attributes, physics, and precision of these grasps during open (non-laparoscopic) surgery is limited. One study found greater suturing precision among surgeons using palm grasp as compared to tripod grasp (Seki, 1988), and the author speculated that the palm grasp was more stable and reduced the difference in angle between the hand and the instrument. Despite the limited research comparing the grasps, surgical textbooks make assertions about their qualities and disadvantages. Toombs and Bauer (1993) state that the modified thenar eminence (palm) grip results in imprecise release of the needle, making this grip poorly suited to delicate suturing compared to the thumb-third finger (tripod) grip. This contrasts with Seki’s (1988) finding of greater accuracy when using the palm grip.
Several studies have used electromyography (EMG) to compare the ergonomic aspects of various grasps. Surface EMG uses electrodes on the skin to detect the electrical activity produced by the summed motor unit action potentials in the muscle of interest (Criswell, 2011). EMG signal strength has an approximately linear relationship with muscular force, making it useful in ergonomics for determining the amount of individual muscle involvement in a given task, and allowing evaluation of strain on the tissues (Hägg et al., 2004). One study comparing two different grasp styles on a laparoscopic instrument found differences in EMG amplitude in several forearm muscle groups, leading to the recommendation of a specific, palm-grasp style in certain circumstances (Berguer et al., 1999). A second study comparing various laparoscopic handle designs found that the pattern of EMG activity—the proportional use of each measured muscle—is characteristic of the handle (and thus the grasp) used, rather than being task-specific (Matern et al., 2004). A similar EMG study of handwriting grasp styles also showed characteristic EMG activation patterns for each grasp style (de Almeida et al., 2013).
The amplitude probability distribution function (APDF) is a means of EMG data reduction that is used to characterize the muscular load profile over a period of time (Hägg et al., 2004). The calculation reveals the cumulative probability for EMG amplitude over time, and can be normalized for each subject to a percentage of their maximum voluntary contraction (%MVC) for that muscle. APDF levels are often reported as 10th, 50th, and 90th percentiles, with 10th %APDF representing static load, 50th% APDF median load, and 90th% APDF considered peak load for that muscle (Szeto et al., 2009).
The current study aimed to examine variations in muscular force and muscle use patterns between surgeons using a palm grasp versus a tripod grasp while suturing. It was expected that the results could be used to guide surgeons in selecting which grasp to use routinely, and indicate which grasp to choose or avoid to decrease strain on specific muscles and their associated tendons and ligaments.
Methods
Participants
A total of 14 (4 male, 10 female) veterinarians were recruited for the present study. Participants were recruited into one of two groups, palm or tripod, depending on their usual, preferred needle holder grasp pattern. All subjects were right-handed.
Participants were recruited at two veterinary conferences: the North American Spay/Neuter Conference in Austin, Texas and the Silicon Valley Spay & Neuter Symposium in Milpitas, California, in 2014. Two additional veterinarians were recruited at a spay/neuter strategy meeting in Burlington, Vermont. Consent to participate was obtained from each participant before the study began. The study was approved by the Psychology Research Ethics Committee at the University of Derby
All participants in the study were asked to complete a questionnaire prior to participation. Demographic data including year of birth, year of graduation from veterinary school, whether they have obtained any specialty certification, and current hours per week performing surgery were recorded. Participants were shown pictures of “palm” and “tripod” grasps, and asked which grasp they use, or, if a mixture of grasps, in what proportion they use those grasps. They were also asked when they began using their current instrument grasp, whether they have used a different grasp at any point in their career, and why they have chosen their current instrument grasp.
Four muscles in the right forearm region were selected for the electro- myography (EMG) study: extensor digitorum communis (EDC), flexor carpi radialis (FCR), flexor carpi ulnaris (FCU) and abductor pollicis longus/ extensor pollicis brevis (APL). The I-330-C2+ system (J&J Engineering, Inc., Poulsboro, WA) was used to capture the surface EMG data, with a bandwidth of 10-400 Hz and a common mode rejection ratio of 100 dB, with input impedance 10 GW and a notch filter of 60 Hz. The EMG signals underwent a 16 bit analogue to digital (A/D) conversion at a sampling frequency of 1024 Hz.
Bipolar Ag-AgCl surface electrodes (Norotrode 20, Myotronics, Inc, Kent, WA) with an inter-electrode spacing of 22 mm were used. The ground electrode was an 1 3/8 inch Ag-AgCl electrode (SilveRest, Vermed, Bellows Falls, VT) that was placed on the right upper arm above the elbow.
The locations for EMG electrodes were adopted from Perotto (2011) and Criswell (2011). Before attaching electrodes, the skin was prepared by abrading with a gauze sponge. After electrode placement, the skin impedance was checked using the impedance testing function in the I-330-C2+, and impedance below 900 KW was considered acceptable.
Prior to starting the experiment, subjects were asked to perform two trials of resisted isometric maximum voluntary contractions (MVC) of 5 seconds each against manual resistance for each muscle.
Video Recording
Each session was recorded using 1080p HD video at 30 frames per second using an iPhone 5S (Apple, Inc, Cupertino, CA). A single, front view recording of each participant was made, and markers in the EMG recording allowed synchronization of video and EMG recordings.
Video recordings were used to examine posture during surgery using Rapid Upper Limb Assessment (McAtamney & Corlett, 1993). RULA assessment was made at the time in the work cycle when the highest loads occurred, assessing the participant’s dominant arm, and applied just to the experimental condition (not extrapolated to a “typical” work day).
Protocol
Each participant stood at a table adjusted to their preferred height. Participants were then asked to use an 5.5 inch Olsen-Hegar needle holder (Spectrum Surgical, Stow, OH) and thumb forceps to place five simple interrupted sutures in a polyvinyl alcohol synthetic chamois skin model using 3-0 Monocryl suture on a 40 mm, ½ circle taper needle. Measurements taken during the first suture were not included in the analysis, in order to allow the surgeon to become familiar with the materials and task.
Data Processing and Analysis
The USE3 Physiolab (J&J Engineering, Inc., Poulsboro, WA) software was used to process the EMG data. Data processing involved full-wave rectification and smoothing with root-mean-square (RMS) with a 250 ms window. These data were then exported to Microsoft Excel to compute the MVCs for each muscle, and to SPSS to compute the 10th%, 50th% and 90th% levels of Amplitude Probability Distribution Function (APDF) for the four muscle groups.
Pain severity for each body region was calculated for each participant using the scoring guidelines accompanying the CMDQ and CMHQ (Hedge, n.d.). Frequency scores were assigned: never = 0; 1–2 times a week = 1.5; 3-4 times a week = 3.5; every day = 5; several times a day = 10. Discomfort scores were assigned: slightly uncomfortable = 1; moderately uncomfortable = 2; very uncomfortable = 3. Daily interference scores were assigned: not at all = 1; slightly interfered = 2; substantially interfered = 3. Pain severity was obtained by multiplying the frequency, discomfort, and interference scores for each body part. Total body pain severity for an individual was obtained by summing all the body pain severity scores for that individual. Total hand pain scores were obtained by summing the hand pain severity scores for that individual. Total overall pain scores were obtained by summing the hand pain and body pain scores for that participant.
Demographic, MSD, and EMG data were entered into SPSS. Pearson correlations were used to assess relationships between MSD and demographic and postural characteristics. APDF levels of different muscles were compared using paired sample t-tests.
Results
Demographics
A total of 14 veterinarians participated in this study, including 10 (71.4%) females and 4 (28.6%) males (Table 1). The median age of participants was 43 years, with a range of 31 to 62 years of age. Median time since graduation from veterinary school was 13.5 years, with a range of 4 to 32 years. None of the veterinarians had obtained board specialty certification. Participants spent a median of 17.5 hours a week in surgery, with a range from 0 to 35 hours weekly. Two participants did not regularly perform surgery in their current jobs: one was in a management position and performed surgery on an as-needed basis, and the other was seeking employment. Both of these veterinarians had several years experience performing surgery.
Table 1. Participant demographic, workload, instrument grip, and discomfort data
Musculoskeletal Discomfort Prevalence
The self-reported 1-week period prevalence of MSD was 92.9%, with 13 of 14 participants reporting pain. Of these, 7 (50%) reported hand pain, and 12 (85.7%) reported body pain. All who reported discomfort also reported that it interfered at least slightly with their ability to work. In the right hand, the most commonly reported areas of MSD were the distal thumb (first proximal and distal phalangeal area; 28.6%), and the thumb base (first metacarpal area; 28.6%). MSD was reported in some portion of the right thumb [phalangeal and metacarpal areas] by 42.8% of participants. Body MSD was most commonly reported in the lower back (71.4%), right shoulder (50%), and neck (50%).
Pain severity was not correlated with age (r (12)= 0.233, p= 0.424) or hours per week in surgery (r (12)= 0.005, p= 0.987), and was unrelated to the sex of the participant (t(12) = -1.415, p=0.182).
Grasp Characteristics
Eight of the participants reported using tripod grasp all or most of the time, and 5 reported using palm grasp all or most of the time. The remaining surgeon reported using the two grasps equally. Eleven participants (78.6%) reported having adopted their current grasp in veterinary school or before, whereas 3 participants (21.4%) reported to have modified their grasp after graduation from school.
Actual observed grasps differed from those reported by participants (Figures 1-5). Video analysis revealed that 5 participants used exclusively tripod grasp with the thumb and ring finger in the instrument rings (1, 4 tripod), one of whom routinely placed her fifth finger in the instrument ring with her fourth finger. Two participants used a modified tripod grasp with the thumb and middle finger (1, 3 tripod) in the instrument rings. Three participants used palm grip for suture placement (driving the needle through the substrate) and switched to 1, 4 tripod grasp during needle extraction and knot tying (palm/tripod). Three participants used palm grasp with no fingers in the instrument rings, and one participant used a palm grasp with the ring finger in one instrument ring.
Figure 1. Instrument grasps used by study participants.: 1,4 tripod grasp
Figure 2. Instrument grasps used by study participants: 1,4 tripod grasp with fifth finger in ring.
Figure 3. Instrument grasps used by study participants: 1,3 tripod grasp
Figure 4. Instrument grasps used by study participants: Palm grasp.
Figure 5. Instrument grasps used by study participants: Palm grasp with fourth finger in ring.
Electromyography
Results of electromyographic recordings are presented in Table 2. In one participant, EMG readings were not obtained for FCU activity, as the electrodes loosened during the experiment.
Table 2. Results of low (10th % APDF), median (50th % APDF), and high (90th % APDF) muscle activities for all muscle groups and each participant. All values are expressed as a percentage of the maximum voluntary contraction (%MVC) for that muscle in that participant.
EDC: extensor digitorum communis, FCR: flexor carpi radialis, FCU: flexor carpi ulnaris, APL: abductor pollicis longus/ extensor pollicis brevis. *FCU electrodes loosened on Participant 7, preventing data collection from this muscle
The 10th % APDF, representing the static load on each of the four muscles, ranged from 0.9 to 10% MVC, with greater mean values for the extensor EDC (M = 5.51; SD = 1.37) than for the flexors FCR (M = 3.27, SD= 1.62) and FCU (M = 3.33, SD=1.53). These differences were statistically significant, with EDC:FCR t(13) = 5.082, p<0.001 and EDC:FCU t(12) = 4.824, p<0.001, two tailed. This differential activation level persisted between the EDC and FCU at the 50th and 90th % APDF, whereas the mean activity level of the FCR increased by the 50th and 90th % APDF so that there was no difference at either time between EDC and FCR activation levels (Figure 6).
Figure 6. Muscle activation of extensors and flexors at the 10th, 50th, and 90th percentile APDF, expressed as a percentage of the maximum voluntary contraction (%MVC) for that muscle.
EDC: extensor digitorum communis, FCU: flexor carpi ulnaris, FCR: flexor carpi radialis. * significant difference between mean activation levels.
The unexpected diversity of grasp styles and small number of participants using each grasp prevented adequate comparisons of muscle activation patterns between grasps.
Postural comparisons
RULA assessments produced scores of 3 or 4 in all subjects, indicating that overall postural scores did not differ substantially between subjects, and that all fell into the moderate risk category. Variations in the degrees forearm pronation and supination were noted between subjects, with a range of 80 to 180 degrees of rotation (M= 125, SD = 26.5). The degree of rotation did not appear to be related to the instrument grasp, and was positively correlated with the total pain score determined on the CMDQ and CHDQ questionnaires (r (12)= 0.556, p= 0.039).
Discussion
There has been little previous research into the physical demands of high volume spay neuter surgery. A previous study of MSD prevalence in spay neuter veterinarians (White, 2013) found a 99.1% one-month period prevalence of MSD, which is slightly higher than the 92.9% one-week period prevalence reported in the current study. The body sites with the highest prevalence of MSD were the same in the two studies, with participants most often reporting body MSD in the lower back, shoulders and neck, and hand MSD in the right distal thumb and in the right thumb base. The previous study demonstrated increased MSD risk with increased weekly surgery hours and increased years of work, an effect not seen in the current study. However, these factors had weak explanatory power, accounting for less than 5% of the variability in MSD scores. This small effect size, paired with the smaller sample size in the current study, may account for this lack of effect. Neither study showed an effect of gender on MSD prevalence.
The EMG findings of greater static load on extensors compared to flexors is likely due to the extension of the metacarpophalangeal joints required to execute any of the needle holder grasps. During median and high load conditions, greater need for wrist flexion increases flexor load. Some of the increase with load in the FCR readings may also be due to crosstalk with the superficial digital flexor (Criswell, 2011), and may be related to creating a tighter instrument grasp as greater force is required.
The amount of grasp diversity between participants, the use of non-standard instrument grasps, and the variability in individual participants’ grasps, were surprising findings in the current study. Participants were often unaware of the grasp that they used. Several described themselves using a grasp different from the one that they actually used, and some noticed in the midst of the experiment that they were using a different grasp from what they had described. Even within a single grasp type, the participants varied in their movement patterns and degrees of forearm rotation and wrist angulation.
Most of the participants claimed to have used their current instrument grasp beginning in veterinary school. However, the wide diversity of grasps, and the use of grasps not described in most veterinary or surgical texts, suggests either that the participants modified their grasps after leaving school, or that their veterinary surgical instructors taught or at least tolerated unconventional grasps. It is also possible that participants’ initial surgery instruction in veterinary school taught conventional instrument grasps, but that later in the curriculum, instructors failed to notice or failed to correct unusual grasps.
After leaving veterinary school, few practitioners receive instruction in instrument grasp or the biomechanics of surgical technique. Veterinary continuing education in surgery emphasizes processes at the “sharp” end of the instrument — the interface between instrument and patient tissue — but generally does not address the interaction between surgeon and instrument. Thus, practitioners are typically on their own as they develop and encode the motor sequences that comprise their practice of surgery.
The process of acquisition of a motor skill such as suturing requires initial cognitive attention to the task and its components. After repetition, performance becomes smoother and the need to concentrate on the task decreases. Finally, the motor sequence becomes automated and the skilled performer loses conscious awareness of individual motor actions (Ericsson, 2004). This automation of learned action sequences into performance units occurs slowly through repetition without requiring conscious awareness (Graybiel, 1998).
Surgeons and their patients benefit from the surgeon’s use of automated motor sequences. Automaticity allows the surgeon to execute complex motor sequences with relatively little cognitive load, freeing up cognitive space to attend to other aspects of surgical performance and optimal patient care. However, while beneficial, automated motor sequences may be difficult for skilled performers to describe or teach to others, to modify, or to break down into component parts (Hamdorf & Hall, 2000). In the case of veterinarians, much of this automation is likely to occur after formal surgical instruction has ceased. Thus, the grasp and movement patterns they ultimately adopt may be based on trial-and-error modifications to the techniques they were originally taught. The resulting variations in technique may be adaptive and beneficial, or they may be adequate but sub-optimal solutions in terms of biomechanics or performance (Bartlett et al., 2007).
In addition to diversity of grasps between surgeons, this study also noted instances of variability within individual surgeons’ grasps and movement patterns. In some cases, skilled performers show more variability than novices in the movements that they use to complete a task (Madeleine, 2010; Madeleine et al., 2008). This may be due to flexibility built into the automated motor sequence that they have acquired, or due to the acquisition of more than one automated motor sequence that can be used to complete the same task. For those with flexibility in their automated motor sequence, it is thought that this variability is made possible by the redundant degrees of freedom available in multi-joint movements (Srinivasan & Mathiassen, 2012). This flexibility allows the performer to adapt to perturbations and uncertainty while still completing the task (Bartlett et al., 2007).
Some skilled performers possess more than one automated movement sequence to perform the same task, and have developed these redundant motor sequences through deliberate practice and refinement (Ericsson, 2004). Among participants in the current study, three reported modifying their grasp after completing veterinary school. Two of these reported making these modifications consciously, and both sometimes use palm grasp and sometimes use 1,4 tripod grasp, selecting their grasp based on ease, comfort, and the appropriateness of the grasp to the specific suturing task.
It is likely that there is no single, unique movement pattern that optimizes performance (Bartlett et al., 2007). All of the veterinarians in the current study are experienced in high volume spay and neuter surgery, and each has performed thousands of procedures. The diversity in grasps, movement patterns, and muscle use described in this study all represent functional variations upon the task of suturing. Nonetheless, surgeons may benefit from developing multiple functional movement patterns that can be used to achieve the same task, both because this flexibility may lead to improved surgical performance, and because the increased variability may decrease repetitive strain.
Differences between individuals performing the same task make it difficult to characterize biomechanical exposure and consequent risk based on job description or work hours, and also suggest a possible mechanism for the differences between individuals in MSD susceptibility (Srinivasan & Mathiassen, 2012). The current study did not evaluate variability per se, and only examined a single task within the larger task of surgery, so was not adequate to see the scope of variability within spay neuter work. Future research could examine whether increased motor variability in surgery can be taught, and if so, the optimal amount and type of variability. Also, future studies could examine whether teaching a new grasp and motor sequence could allow a surgeon to recover from MSD, and whether surgeons with more than one grasp and corresponding automated motor sequence are more resilient than those with a single movement pattern.
Conclusions
The present study found an unexpected diversity of needle holder grasps used by spay neuter veterinarians while suturing. All were characterized by extensor dominance during static load. Future investigation into the characteristics and benefits of various grasps is warranted, so that practical advice on reducing strain and MSD risk can be offered to surgeons. In addition, examination of current surgical instruction and learning may help explain the origination of the diversity of grasps encountered here.
Anderson, R.M., & Romfh, R.F. (1980). Technique in the use of surgical tools. New York: Appleton-Century-Crofts.
Bartlett, R., Wheat, J., & Robins, M. (2007). Is movement variability important for sports biomechanists? Sports Biomech, 6(2), 224-243. doi: 10.1080/14763140701322994
Berguer, R., Gerber, S., Kilpatrick, G., Remler, M., & Beckley, D. (1999). A comparison of forearm and thumb muscle electromyographic responses to the use of laparoscopic instruments with either a finger grasp or a palm grasp. Ergonomics, 42(12), 1634-1645. doi: 10.1080/001401399184721
Booth, H.W. (2013). Instrument and tissue handling techniques. In K. M. Tobias & S. A. Johnston (Eds.), Veterinary surgery: Small animal: 2-volume set (pp. 201-213): Elsevier Health Sciences.
Criswell, E. (2011). Cram’s introduction to surface electromyography (2nd ed.). Sudbury, MA: Jones & Bartlett Publishers.
de Almeida, P.H., da Cruz, D.M., Magna, L.A., & Ferrigno, I.S. (2013). An electromyographic analysis of two handwriting grasp patterns. Journal of electromyography and kinesiology, 23(4), 838-843. doi: 10.1016/j.jelekin.2013.04.004
Ericsson, K.A. (2004). Deliberate practice and the acquisition and maintenance of expert performance in medicine and related domains. Academic Medicine, 79(10), S70-S81.
Graybiel, A.M. (1998). The basal ganglia and chunking of action repertoires. Neurobiology of learning and memory, 70(1), 119-136.
Hägg, G., Melin, B., & Kadefors, R. (2004). Applications in ergonomics. In R. Merletti & P. Parker (Eds.), Electromyography: Physiology, engineering, and noninvasive applications (pp. 343-363). Hoboken, NJ: John Wiley & Sons, Inc.
Hamdorf, J., & Hall, J. (2000). Acquiring surgical skills. British Journal of Surgery, 87(1), 28-37.
Hedge, A. (n.d.). Cornell musculoskeletal discomfort questionnaires (cmdq). Retrieved 4 January, 2015, from http://ergo.human.cornell.edu/ahmsquest.html
Kirpensteijn, J., & Klein, W. (2006). Instruments. In J. Kirpensteijn (Ed.), Cutting edge: Basic operating skills for the veterinary surgeon (pp. 31-43). Ripon: Roman House Publishers Ltd.
Kozak, A., Schedlbauer, G., Peters, C., & Nienhaus, A. (2014). Self-reported musculoskeletal disorders of the distal upper extremities and the neck in german veterinarians: A cross-sectional study. PLoS ONE, 9(2), e89362. doi: 10.1371/journal.pone.0089362
Latko, W.A., Armstrong, T.J., Franzblau, A., Ulin, S.S., Werner, R.A., & Albers, J.W. (1999). Cross-sectional study of the relationship between repetitive work and the prevalence of upper limb musculoskeletal disorders. American Journal of Industrial Medicine, 36(2), 248-259. doi: 10.1002/(SICI)1097-0274(199908)36:2<248::AID-AJIM4>3.0.CO;2-Q
Looney, A.L., Bohling, M.W., Bushby, P.A., Howe, L.M., Griffin, B., Levy, J.K., Eddlestone, S.M., Weedon, J.R., Appel, L.D., Rigdon-Brestle, Y.K., Ferguson, N.J., Sweeney, D.J., Tyson, K.A., Voors, A.H., White, S.C., Wilford, C.L., Farrell, K.A., Jefferson, E.P., Moyer, M.R., Newbury, S.P., Saxton, M.A., Scarlett, J.M., Association of Shelter Veterinarians, S., & Neuter Task, F. (2008). The association of shelter veterinarians veterinary medical care guidelines for spay-neuter programs. Journal of the American Veterinary Medical Association, 233(1), 74-86. doi: 10.2460/javma.233.1.74
Madeleine, P. (2010). On functional motor adaptations: From the quantification of motor strategies to the prevention of musculoskeletal disorders in the neck-shoulder region. Acta physiologica, 199 Suppl 679, 1-46. doi: 10.1111/j.1748-1716.2010.02145.x
Madeleine, P., Voigt, M., & Mathiassen, S.E. (2008). The size of cycle-to-cycle variability in biomechanical exposure among butchers performing a standardised cutting task. Ergonomics, 51(7), 1078-1095. doi: 10.1080/00140130801958659
Matern, U., Kuttler, G., Giebmeyer, C., Waller, P., & Faist, M. (2004). Ergonomic aspects of five different types of laparoscopic instrument handles under dynamic conditions with respect to specific laparoscopic tasks: An electromyographic-based study. Surgical Endoscopy And Other Interventional Techniques, 18(8), 1231-1241.
McAtamney, L., & Corlett, E.N. (1993). Rula: A survey method for the investigation of work-related upper limb disorders. Applied Ergonomics, 24(2), 91-99.
Perotto, A. (2011). Anatomical guide for the electromyographer: The limbs and trunk: Charles C. Thomas Publisher, Limited.
Scuffham, A.M., Legg, S.J., Firth, E.C., & Stevenson, M.A. (2010). Prevalence and risk factors associated with musculoskeletal discomfort in new zealand veterinarians. Applied ergonomics, 41(3), 444-453. doi: 10.1016/j.apergo.2009.09.009
Seki, S. (1988). Suturing techniques of surgeons utilizing two different needle-holder grips. American journal of surgery, 155(2), 250-252.
Smith, D.R., Leggat, P.A., & Speare, R. (2009). Musculoskeletal disorders and psychosocial risk factors among veterinarians in queensland, australia. Australian veterinary journal, 87(7), 260-265. doi: 10.1111/j.1751-0813.2009.00435.x
Soueid, A., Oudit, D., Thiagarajah, S., & Laitung, G. (2010). The pain of surgery: Pain experienced by surgeons while operating. International journal of surgery, 8(2), 118-120. doi: 10.1016/j.ijsu.2009.11.008
Srinivasan, D., & Mathiassen, S.E. (2012). Motor variability in occupational health and performance. Clinical biomechanics, 27(10), 979-993. doi: 10.1016/j.clinbiomech.2012.08.007
Szeto, G.P., Straker, L.M., & O’Sullivan, P.B. (2009). Examining the low, high and range measures of muscle activity amplitudes in symptomatic and asymptomatic computer users performing typing and mousing tasks. European journal of applied physiology, 106(2), 243-251. doi: 10.1007/s00421-009-1019-4
Toombs, J.P., & Bauer, M.S. (1993). Basic operative techniques. In D. Slatter (Ed.), Textbook of small animal surgery (2nd ed., Vol. 1, pp. 168-191). Philadelphia, PA: Saunders.
Weiss, Y. (1973). Simplified method of needle-holder handling. Archives of Surgery, 106(5), 735-736.
White, S. (2013). Prevalence and risk factors associated with musculoskeletal discomfort in spay and neuter veterinarians. Animals, 3(1), 85-108.
Yoon, H.-Y., & Mann, F.A. (2011). Instrument handling. In F. A. Mann, G. M. Constantinescu & H.-Y. Yoon (Eds.), Fundamentals of small animal surgery (pp. 128-142).
Like a lot of people, I find myself working from home these days. Between the needs for social distancing and for preserving medical supplies, my “day job” as a spay neuter vet has been sidelined, so I find myself dreaming up new projects and spending more time in front of a screen.
As we find ourselves building office spaces at home, we may be faced with combining computers, chairs, and desks that were not designed for use together or that don’t fit well with our physical needs or proportions.
But what does a good ergonomic setup look like? Are there ways to improve a home office to make it more comfortable for more hours of use?
My home office setup
In order to explain some of the fundamentals of office ergonomics, I will use my own home office setup as an illustration. This is the space that I’ve used for various writing and editing projects, so I have been tinkering with the setup for a while to make the space comfortable for long periods of use. But you’ll also see that I have improvised a few solutions for items that just weren’t sized for me.
My home office. My laptop computer (red arrow) is connected to an external monitor and wireless keyboard. My mouse (green arrow) is elevated on a platform, and my feet are also on a riser (pink arrow). I’m using a chair with adjustable height and adjustable arm rests (yellow arrow).
Computer Equipment
I have a laptop computer and I love the flexibility and portability. When I am using the computer for reading (for example, reading an article or editing a book chapter), I’m usually on the sofa or a recliner rather than in a desk-and-chair setup. But when I really want to get down to work and do a lot of typing or visual design (for example, writing this post, writing a book, editing photos) I use my laptop with an external monitor and wireless keyboard, essentially turning it into a desktop computer.
Laptop ergonomics
The problem with laptops is that they are built for portability rather than good ergonomics. When the keyboard is at a comfortable height (say, on a pillow on your lap on the couch), the screen is too low so you end up with your neck bent at something like a 30 degree angle. This may be especially problematic for people (like surgeons) who already have jobs that necessitate a forward-bent neck.
Conversely, when the laptop screen is elevated to a height that allows the user to look at the screen with minimal neck bending, the attached keyboard is much too high for comfortable use.
It is possible to have good ergonomics with a laptop and either an external monitor or a separate keyboard. To use a laptop with a separate keyboard, the laptop should be placed on a laptop stand or an elevated platform (a box, a stack of books) that places the top edge of the laptop screen at or slightly above eye level, and the keyboard should be placed at or just below elbow level. To use a laptop keyboard with a separate monitor, the monitor should be placed so that the top edge of the monitor is 2-3 inches above eye level, and the laptop placed so that the keyboard is at or below elbow level.
I chose to have both an external monitor and external keyboard because I want a large monitor (for giant spreadsheets or side-by-side editing) and also a larger, more supportive keyboard compared to the built-in laptop keyboard. So in my setup, the laptop sits closed on the monitor base and provides the processing and computing power, but I don’t use the laptop screen or keyboard when I’m working at a desk.
Keyboard
The computer keyboard should be placed at or below elbow level. Most keyboards are level or slope slightly towards the user, but some research has shown that it’s actually better for hand and wrist posture if the keyboard is tilted slightly “downhill”away from the user.
My keyboard and mouse. The keyboard tray height is good for keyboarding, but too low for mousing, so a textbook serves as a mouse pad platform. Note also the closed laptop computer and the separate number keypad.
For regular typing (words, sentences, paragraphs), the keyboard should be centered in front of you. However, if your keyboard has an attached number pad and you are doing a lot of number entries, you will have the least strain if the number pad is located in easy reach of your dominant hand, which may mean that the keyboard is placed off center from your body.
The keyboard that I use has a separate number pad. The main reason that I like this is so that the keyboard itself is more compact, which means my mouse can be placed closer to my hands. With my previous long keyboard with attached number pad, I found myself constantly leaning, straining, or twisting to reach the mouse, especially at times when I was alternating between mousing and typing.
The best type of chair for home office work will vary with the type of computer work being done, and also depends on the person or people using that seating. Most of the time, an office chair with adjustable height, adjustable back rests including lumbar support, and adjustable arm rests is recommended. Unless the chair back is reclined to 120 degrees or greater, a headrest is not necessary (although some may find it comfortable to have one).
The chair should fit the user: the width of the seat pan should support your thighs but not be so long that it contacts the backs of your knees, as this may be uncomfortable and may also obstruct blood circulation. The width of the seat pan should allow an inch or so between the outside of the thighs and the armrests. Armrests that are mounted to the chair back rather than on pillars attached to the seat pan will allow a bit more thigh clearance for those that would benefit from this. For users who can not find a chair whose arm rests are placed far enough apart to fit their thigh width comfortably, an armless chair may be most suitable. Similarly, in circumstances where the job demands getting up and down often, chair arms may get in the way and an armless chair (or a chair whose arms swing out of the way) may be better for these jobs.
Adjusting the chair
The height of the chair should be adjusted so that the user’s feet can be placed flat on the floor. While this seems simple enough, if you are working with a fixed height desk and adjustable height chair, you may find that when the chair height is adjusted properly for the length of your lower legs, the desk height is all wrong for the height of your keyboard (see the previous section on keyboards).
My elevated footrest: a textbook from the first semester of ergonomics graduate school. I’m pretty sure the authors would be proud of the ongoing use of their heavy tome.
If your legs are short and/or your desk is high and fixed height, a footrest can help fix the geometry of your office space. There are commercially made footrests for office workers for just this reason. In my case, I improvised, using a textbook as a footrest, and have been content with this solution.
If your legs are long, once you have adjusted your chair you may find that your desk is too low and not adjustable. Elevating the desk using wood blocks or bed risers would get the geometry back in sync.
If you are working with a chair without height adjustments, you may have to improvise a bit on your office configuration in order to get the geometry of your office as low-stress (ergonomically) as possible.
Armrests
Armrests should be adjusted to the height of the user’s elbows while seated. Most of the time while using the computer, you don’t actually use the armrests: as I am typing in the picture below, my arms are not on the armrests at all. However, in the next picture I use both armrests as I sit back and use the mouse and not the keyboard
Keyboarding posture. When I’m keyboarding I don’t use the arm rests. I’ve pulled my chair a little further forward than when just reading or mousing, so that the arm rests overhang the keyboard tray by a few inches. My elbows are relaxed by my side. The keyboard tray is low enough and slightly angled downward to avoid having an extended wrist angle.
Mousing posture. I’m using both armrests and leaning back on the chair back. My right armrest, along with the elevated mouse pad, lets me keep a straight wrist and relaxed hand while I cruise Google Scholar.
Desk
The ideal desk would be adjustable in height and would have a separate keyboard tray that was also adjustable. My own desk has one out of two: it has the keyboard tray, but the desk and tray are at a fixed height from the ground. This fixed height is the reason I have to raise my chair enough that I require a footrest. If my desk (or even just the keyboard tray) was adjustable, I would be able to lower the keyboard by a couple of inches, lower my seat, and not need the footrest.
Positioning and posture
The screen is about an arm’s length from my face.
Once you have the computer equipment and you have adjusted the chair and desk (and optional footrest and any other MacGyver ergonomic devices), the next task is figuring out how to positioning use them.
The monitor or screen should be about arm’s length away. Most of the time, the monitor should be straight ahead of the user. For tasks where you will be using one side of the monitor more than the other (left-justified word processing on a wide screen), it may be best to center yourself on the working part of the screen.
If you will be using more than one monitor, centering can be more difficult. If both monitors are used equally then you can place the dividing line between the two straight ahead so that you don’t have to look very far to either side to see either screen. If one of the two monitors is used much more frequently, then that one should be straight ahead and the secondary monitor placed nearby in the field of view (beside or perhaps above or below the main monitor)
posture
Your body posture should be relaxed and supported by your chair, just as your lower legs are supported by the floor or footrest. Your chair is the anti-gravity device that keeps you from having to expend muscular effort to keep yourself upright. Sit in your chair in a way that lets you take advantage of this.
Computer posture. Sitting up at a 90 degree angle as in the first photo (90 degree angle between thighs and back) takes muscular work. It’s not wrong, but it’s hard to maintain for an hour or a day of computer use. When you lean back on your chair back so that your back angle is about 110 degrees from your thighs, you can use the back of the chair to do the work for you.
And remember, just like when doing surgery, it’s important to take breaks to rest and stretch. Much of the early research on micropauses took place in an office environment, and the data supporting break-taking as a way to decrease fatigue and pain and increase performance is impressive. Micropauses can be just a minute or so every twenty or thirty minutes and should consist of changing position and stretching or moving. Try set a timer for microbreaks or, failing that, try to hydrate enough that trips to the bathroom are inevitable reminders to pause and stretch.
What about standing desks?
Standing desks are a great idea for encouraging movement and offering a change in position through the day. As someone who stands for work most of the time, I haven’t set up a standing desk for myself. Ergonomists don’t necessarily find that standing desks are better than sitting, but what they do find is that being able to change position through the work day is important.
Some workplaces have adjustable height desks and chairs so that workers can remain at the same workstation and, with the press of a button, convert that workstation from sitting to standing and then back again. People working from home (especially on a short term, emergency basis such as during a pandemic) are much less likely to have these adjustable desks and so must improvise. One worthwhile option is to configure both a standing desk and a sitting desk, and perhaps have each of these spaces set up for different tasks, so that desk height switching is enforced whenever task switching is necessary.
For standing desks, the relative configuration of the keyboard and monitor with respect to the user’s eyes, shoulders, and elbows should be the same as for sitting desks. The top of the monitor should be slightly above eye level. The keyboard should be at about elbow height or slightly below when the shoulders are relaxed and the upper arms hang slightly in front of vertical beside the body. Flooring and footwear should be comfortable, and consider using a floor mat, especially if standing for several hours.
Meanwhile…
Moe judges me while I try on my mask.
As for me, I’ve been healthy but find myself on an enforced vacation of unknown length. Unlike other jobs where you can work from home, spay-neuter doesn’t work well from a distance. I made myself a surgery mask in hopes that I could donate my my disposable masks but still return to work sometime soon, but for the short (and medium?) term, it looks like self-isolation is key.
So what is a spay neuter vet and book editor to do? I’m seriously toying with writing the next textbook, the one I’ve known for years was needed but never had the time to work on: Ergonomics in Veterinary Medicine. Will I or won’t I? I’ll let you know as soon as I know…
Those of you who have spent any time with me during the past 2 years have probably heard about my work as the editor of the long-awaited Spay Neuter Textbook. Well, it’s finally here! The e-book version has been available for a few months, but the print copies just arrived at the publisher’s this week.
Want to order a copy? This link will take you to Wiley’s page for the book with links to various sellers. And when you receive your copy, let everyone know what you think by reviewing the book on Amazon.
This book is the product of the dreams and hard work of a lot of people: there are dozens of contributing authors with a variety of areas of expertise, and I have been honored and humbled to work with them all.
So what’s in the book? Who is it for?
I could write a long blog post on this from scratch, but I realized that I already answered these questions when I wrote the book’s preface and acknowledgements. So I’ve included these two sections here to answer these questions and to provide a sense of the history, context, and organization of the book.
I hope that this is the book you’ve been looking for — enjoy!
Why do we need a spay-neuter textbook?
Spaying and neutering are often the first (and in some cases, the only) surgeries that students learn in veterinary school, and are expected skills for every new graduate in general small- or mixed-animal practice. It can be tempting to dismiss them as “beginner surgeries,” the easily trivialized but sometimes terrifying rites of passage into the veterinary profession. Perhaps because spaying and neutering are skills learned so early and repeated so often in a general practitioner’s veterinary career, they are rarely the subject of continuing education seminars and articles, and general practitioners may go their entire career without modifying or even questioning the techniques for spaying and neutering that they learned as third-year veterinary students.
At the same time, spaying and neutering have been central to efforts to reduce the overpopulation and euthanasia of unwanted and unowned cats and dogs. The spay-neuter clinics and programs that arose over the past several decades recognized the need for minimally invasive, efficient techniques that would shorten surgical times and improve patient recovery. This textbook pulls together many of the surgical, anesthetic, perioperative, and operational techniques discovered, developed, and popularized over the decades by these innovative spay-neuter pioneers.
High-Quality, High Volume Spay Neuter (or HQHVSN, the awkward but now widely used acronym adopted by the first Spay Neuter Task Force) is the field of veterinary medicine that began with the efforts of spay-neuter pioneers in the 1970s through 1990s and became firmly established and advanced by the publication of the 2008 and 2016 spay-neuter guidelines. HQHVSN is defined as “efficient surgical initiatives that meet or exceed veterinary medical standards of care in providing accessible, targeted sterilization of large numbers of cats and dogs to reduce their overpopulation and subsequent euthanasia”(Griffin et al., 2016).
Until now, practitioners new to HQHVSN or isolated in their practice have had no single place to turn to find out about HQHVSN techniques and protocols and the evidence supporting them, or about spay-neuter program types, their implementation and staffing, and their effects on animal populations and individual animal health. Many of the techniques used in HQHVSN have been taught at conferences and mentorship programs and shared and spread between practitioners, and many have been subjects of peer reviewed research; however, few appear in textbooks. Nevertheless, the medical, surgical, and perioperative care described in this book need not be limited to high-volume or shelter settings—they are applicable wherever veterinary surgery is performed.
This book is divided into two parts, and each of those parts divided into several sections. Part 1, Clinical Techniques and Patient Care, is concerned with evidence-based clinical knowledge and skills including perioperative, anesthetic, and surgical techniques. Part 2, Fundamentals of HQHVSN, introduces the high-volume surgical setting and the special organizational, logistical, and epidemiologic challenges that arise when striving to optimize the clinic’s operations and impact.
The book is intended for a range of audiences: from the veterinary student to the experienced HQHVSN practitioner, and from the veterinary technician to the aspiring spay-neuter clinic founder. Part 1 begins with chapters on determination of patient sex and neuter status, reproductive anomalies and pathologies, the selection of surgical instruments and suture, infectious disease control, asepsis, and stress reduction in the clinic. The sections on anesthesia and surgery cover general principles as well as specific techniques and protocols, including chapters on avoiding and managing both anesthetic and surgical complications, and a chapter on anesthetic and surgical techniques in rabbits and other small mammals.
While many of the techniques covered in Part 1 are well known to experienced HQHVSN surgeons, some of the anomalies, complications, and complicated presentations are unusual and may be once-in-a-lifetime cases for some. Experienced practitioners may also learn of useful variations on or alternatives to their accustomed techniques, or learn new ways of preventing or addressing frustrating complications.
Part 1 concludes with a section on other common shelter surgeries and associated anesthetic procedures, and can serve as a reference for shelter surgeons with a variety of levels of experience. This section includes amputations, eye surgeries, vulvar or rectal prolapse treatment, and dental extractions.
Part 2 of this book moves away from the clinical care of individual patients and into the structures and systems fundamental to HQHVSN, with sections on population medicine, human resources and wellbeing, and HQHVSN program models. Optimizing the potential of HQHVSN requires more than just proficiency in the clinical care (anesthesia and surgery) of individual patients. Effective HQHVSN programs must understand the effects of their interventions on animal populations and individuals; they must combine their clinical skills with appropriate staffing and facilities to allow an efficient and streamlined workflow; they must institute systems that are financially, physically, and emotionally sustainable. Chapter 23 serves as an introduction and roadmap to the second half of this book. The material in this second half of the book should be of interest to anyone seeking to establish a new HQHVSN program or improve an existing one.
Acknowledgements and Deepest Thanks…
First, I want to thank the original four editors of the book: Brenda Griffin, Karla Brestle, Philip Bushby, and Mark Bohling. These four veterinarians have been instrumental in establishing and promoting the field of HQHVSN; this book would not have existed without them. I have had the privilege of working with all four of these people in different capacities over the past decade and a half: as teammates on the ASV spay neuter task force and co-authors on the 2008 and 2016 Guidelines, as co-teachers in pediatric spay neuter wet labs, and finally as contributing authors to this textbook. Thank you for being my mentors and colleagues, and for believing I could do this. Thanks especially to Brenda, who during my editorship has been my cheerleader and sounding board, my informant and historian, and a bridge between the original vision for this book and its evolution and re/vision. The encouragement, context, and friendship you have offered throughout this process has supported and inspired me.
I also want to thank all the HQHVSN and shelter veterinarians I have met over the years in person and online. My early teachers in this field were all virtual (but real!) colleagues who took the time to explain and describe surgical techniques in words, back in the days of dial-up internet, before YouTube. From the sheltervet electronic mailing list that I joined in 2001 to today’s shelter veterinary and spay neuter Facebook communities and hqhvsnvets online group, you have been and continue to be my mentors and my inspiration. Thank you also to my online colleagues who contributed photos for this textbook—your eagerness, openness, and surgical and photographic skills have made this book better.
And a huge thank you to all the authors who have contributed chapters to this textbook. It is your expertise that has driven the field of HQHVSN forward and that makes this book all that it is. This book is a first edition, but it is also a revision: by the time I signed on as editor in early 2018, many of the submitted manuscripts had become dated. I want to thank the authors for their patience and willingness to revise or even overhaul these chapters in order to make the materials as relevant, timely, and useful as possible.
And finally, thanks to my wife Tina, who kept the refrigerator full and the woodstove stoked during my many long hours of writing and editing.
Want to order a copy? This link will take you to Wiley’s page for the book with links to various sellers. And when you receive your copy, let everyone know what you think by reviewing the book on Amazon.
Within the last few months, I suddenly have become middle aged, or at least my eyes have. I’ve been using readers (“cheaters”) the past few years occasionally for reading, and had found them necessary during feline physical exams in order to age the little kittens by their tiny incisors, but it was only this spring that I found that I needed my glasses in surgery as well. Perhaps I could have held out longer if I used swaged-on suture, but threading the needle with my cassette suture was getting challenging.
So I put on my glasses for surgery and could immediately see nothing though the fog. That was an easy fix though– fog-free mask, fitted to the bridge of my nose. These masks have a foam strip along the bridge of the nose that has the added bonus of absorbing sweat on those 80+ degree surgery days.
Yes, they actually work! As long as you shape the metal strip to the bridge of your nose.
But then came the next problem. When I put on my plastic $5 reading glasses and started surgery, I found that, in order to look through the lenses, I had to bend my neck downwards at a greater angle than usual. If I tried to look down with just my eyes, I ended up looking at the bottom of the plastic frame and the small space below it rather than through the lens.
Surgery with no glasses. My neck is bent at a 35-36 degree angle.
With my plastic framed reading glasses, I have to bend my head more in order to avoid having my vision interrupted by the lower frame of the glasses. My neck is at 40 degrees.
The extra angulation really seemed to be uncomfortable for my neck and shoulders, so I tried sliding the glasses further down my nose, “geezer style.” That improved the angle of my neck, but it was a little uncomfortable across my ears and definitely insecure. The glasses would slide on the slick surface of the mask, and there was even one time when they slid off in the middle of surgery. Fortunately I was able to catch them in my hand before they landed in the middle of a cat.
Plastic glasses worn far down on my nose, “geezer style.” My neck angle is just 34 degrees, but the glasses slip.
So I did what all good modern humans do: I appealed to the internet for help. Or, specifically, to some spay-neuter and shelter veterinarian groups that I’m a part of. Suggestions ran the gamut from progressive lenses to loupes to better patient positioning.
Loupes
The idea of wearing loupes in surgery has intrigued me. Ergonomists often suggest them as a way to decrease neck angle, and it seemed that, if I was requiring corrective lenses anyway, I might as well use something that would further help with my neck angulation.
But the thing about loupes is that even if you find ones that you can adjust to a very steep declination angle, it’s still your eyes (or, your extraocular muscles) that are making the adjustment. There is no fancy prism or deflection in the lenses of the loupes– they just force you to turn your eyes downward in order to view through the magnifying lenses. So in that way, it seems that there is nothing that loupes can do regarding angulation that can’t be achieved with your eyeballs and a regular pair of glasses. It’s just a matter of getting those glasses low enough.
Loupes can be really helpful if you need that extra magnification. Here, Dr. Sandy uses a flip-up loupe (plus face shield and LED light) while doing dental work on a dog.
Of course, if you need the extra magnification, loupes can be great. Dr. Sandy let me try on a few pairs of hers and I found the magnification to be way more than what I wanted for spays, and the field of view to be much narrower than I would like. She also told me that there would be about a month’s learning curve in using them. So, I decided to avoid loupes for now.
Progressive Lenses
It turns out that it’s possible to get progressive lenses that have no correction on top, but that have a near-distance correction on the bottom. Since I don’t need glasses for distance vision, I hadn’t considered progressives. But this would be a way to have lenses that allow close vision for surgery, and that have the clear glass on top so I could see the monitors or look at the other people in the room.
Generally progressive lenses would require a prescription, but a local eyeglass store suggested it may be possible to find them online without a prescription (since they are essentially drugstore readers with glass above).
Half Glasses
But it seemed to me that progressive lenses with no correction on top would just be a way to avoid always looking over one’s glasses at people. So why not find some half glasses designed to fit as low on the bridge of my nose as possible? That way when I look down I’m still looking through lens, and when I look up I’m looking over the glasses.
Half glasses. Don’t you wish you could be this cool? Also, they go well with grey hair.
I like the light weight and thin metal construction of these glasses. The ear pieces are fine enough that they don’t get all mixed up with my surgery cap and mask ties and irritate the tops of my ears. And the bridge of the glasses sits right down on my nose so that they are as low as possible. Basically, they are like the bottom half of a progressive lens. This sort of glasses is available online, or, as luck would have it, at the South Station Terminal in Boston, where I found mine.
Wearing half glasses in surgery. My neck is at 37 degrees and my glasses aren’t sliding off my face.
So for now I’ve solved my vision-in-surgery problem. Maybe once I reach the age where my vision stops changing, I’ll spring for a pair of progressives, but for now I’ll be looking over my glasses at you.
Today’s post is a little different: I’m sharing the results of a survey of HQHVSN veterinarians and their choices in instrumentation and suture for spay and neuter surgeries.
Instruments and suture are the interface between us and our patients, and are integral to every aspect of our surgical performance: our efficiency, our comfort, and our precision. While I know of other authors who have speculated on the “typical” spay pack or neuter pack in private practice or in HQHVSN, I didn’t know of any study of what is actually used out there in practice. So, I designed a study and am publishing it here.
Methods
An 8-question multiple choice and matrix-type question survey was designed in Survey Monkey. The first 3 questions included separate answer grids for numbers and types of instruments and drapes in dog spay, dog neuter, and cat spay packs. Respondents were then asked about usage of suture cassettes versus suture with needles attached (swaged-on), suture type preferences, and finally suture size preferences for different surgery types and patient sizes.
A link to the survey was distributed to the HQHVSNvets Yahoo Group and was posted on the Association of Shelter Veterinarians Facebook group. Reminders were distributed on 5/1/18. Responses were collected from 4/26/18 to 5/9/18, and results were downloaded into Microsoft Excel for analysis.
Results
There were 83 completed responses to this survey. Of those, one veterinarian performed only cat surgeries, whereas the other 82 performed cat and dog surgeries.
Surgery Packs
Of the 82 veterinarians working with cats and dogs, 12 (14.6%) had only one type of surgery pack that they would use for any of the different surgeries. In addition, there were others who used the same pack type for multiple types of surgeries, but not for all surgery types. Six (7.3%) used the same type of packs for cat spays and dog neuters, but different pack types for dog spays. Two (2.4%) used the same types of packs for dog spays and neuters, but a different type of packs for cat spays.
There were a median of 11 instruments in each dog spay pack, with a range from 6 to 18. All dog spay packs contained a spay hook, a thumb forcep, scissors, and a needle holder. Of the needle holders, 79 (96.3%) were Olsen Hegar and only 3 (3.7%) were Mayo Hegar. Of the scissors, 39 packs (47.6%) had Mayo scissors, 62 (75.6%) had Metzenbaum scissors, and 3 (3.7%) had Operating scissors. Twenty-one dog spay packs (25.6%) contained both Mayo and Metzenbaum scissors. Of the thumb forceps, 70 dog spay packs (85.3%) contained Adson Brown forceps, 16 (19.5%) contained rats tooth forceps, and 8 (9.7%) contained Adson tissue forceps. Some packs contained more than one thumb forcep. One respondent commented that they used whichever thumb forcep type had been donated.
The packs with only 6 instruments did not contain any hemostats; all other dog spay packs (98.7%) contained at least one type of hemostat. Seventy-five (91.4%) contained Kelly or Crile type hemostats (1-5 per pack), 68 (82.9%) contained Carmalts (1-4 per pack), and 63 (76.8%) contained mosquito hemostats (1-4 per pack). Some respondents commented that additional instruments including Carmalts or Rochester Pean forceps were available in separately wrapped packages for use as needed on dog spays.
Additional instruments included in dog spay packs were towel clamps in 49 packs (59.8%), with 1-4 towel clamps present per pack, and scalpel blade holders in 32 packs (39.0%). One respondents’ dog spay packs included a Dowling Spay Retractor, and two included Allis Tissue Forceps.
Seventy-five packs (91.4%) contained drapes of some type, with 51 (62.2%) containing cloth drape and 27 (32.9%) containing paper drape (of these, 3 contained both paper and cloth drape). Some respondents also commented that their packs contained huck towels. One respondent commented that drapes are wrapped separately; this is likely to be the case for all clinics where drapes are not included in the packs. 52.9% of the packs containing cloth drapes also contained towel clamps, whereas 70.4% of the packs containing paper drapes also contained towel clamps.
There were a median of 10 instruments in each cat spay pack, with a range from 6 to 15. All cat spay packs contained a spay hook, a thumb forcep, and a needle holder. Of the needle holders, 79 (95.2%) were Olsen Hegar and only 4 (4.8%) were Mayo Hegar. Of the thumb forceps, 70 cat spay packs (84.3%) contained Adson Brown forceps, 13 (15.6%) contained rats tooth forceps, and 8 (9.6%) contained Adson tissue forceps. Some packs contained more than one thumb forcep.
Of the scissors, 28 packs (33.7%) had Mayo scissors, 62 (74.7%) had Metzenbaum scissors, and 5 (6.0%) had Operating scissors. Thirteen cat spay packs (15.6%) contained both Mayo and Metzenbaum scissors, and two packs (2.4%) did not contain scissors.
The packs with only 6 instruments did not contain any hemostats; all other dog spay packs (98.7%) contained at least one type of hemostat. Seventy-seven (92.8%) contained mosquito hemostats (1-4 per pack), 67 (80.7%) contained Kelly or Crile type hemostats (1-3 per pack), and 40 (48.2%) contained Carmalts (1-3 per pack). One contained two Rochester Pean forceps.
Additional instruments included in cat spay packs were towel clamps in 42 packs (50.6%), with 1-4 towel clamps present per pack, and scalpel blade holders in 31 packs (37.3%).
Seventy-nine packs (95.2%) contained drapes of some type, with 51 (61.4%) containing cloth drape and 29 (34.9%) containing paper drape (of these, 3 contained both paper and cloth drape). Some respondents also commented that their packs contained huck towels. One respondent commented that drapes are wrapped separately; this is likely to be the case for all clinics where drapes are not included in the packs. 45.1% of the packs containing cloth drapes also contained towel clamps, whereas 58.6% of the packs containing paper drapes also contained towel clamps.
There were a median of 8 instruments in each dog neuter pack, with a range from 1 to 15. No instrument type was present in every dog neuter pack, although all but one contained at least one hemostat. Two dog neuter packs (2.5%) consisted of only one mosquito hemostat. Sixty (74.1%) (including the two above) contained mosquito hemostats (1-4 per pack), 60 (74.1%) contained Kelly or Crile type hemostats (1-3 per pack), and 34 (42.0%) contained Carmalts (1-2 per pack).
Seventy-eight of 81 dog neuter packs contained needle holders: 74 (91.4% of packs) contained Olsen Hegar and only 4 (4.9%) contained Mayo Hegar. All packs except the single hemostat packs contained thumb forceps; 68 (84.0%) contained Adson Brown forceps, 9 (11.1%) contained rats tooth forceps, and 5 (6.2%) contained Adson tissue forceps. Some packs contained more than one thumb forcep.
Fifty-seven (70.4%) dog neuter packs contained scissors: 28 (34.6%) had Mayo scissors, 38 (46.9%) had Metzenbaum scissors, and 3 (3.7%) had Operating scissors. Twelve dog neuter packs (14.8%) contained both Mayo and Metzenbaum scissors, and 24 packs (29.6%) did not contain scissors.
Additional instruments included in dog neuter packs were towel clamps in 39 packs (48.1%), with 1-4 towel clamps present per pack, and scalpel blade holders in 26 packs (32.1%). Twenty-one (28.4%) dog neuter packs contained a spay hook, likely because these packs were not assembled specifically for dog neuters.
Seventy-two packs (88.9%) contained drapes of some type, with 48 (59.3%) containing cloth drape and 26 (32.1%) containing paper drape (of these, 2 contained both paper and cloth drape). Some respondents also commented that their packs contained huck towels. 41.7% of the packs containing cloth drapes also contained towel clamps, whereas 57.7% of the packs containing paper drapes also contained towel clamps.
Suture
Suture type and packaging
Eighty-two veterinarians responded to the question regarding the suture packaging that they used most commonly. Over half of respondents used swaged-on suture all the time or most often, although 42% used suture from a cassette all or most of the time.
“Other” responses included “Cassette for internal ligatures and large spay closures. Swaged on for small spay closures” and “Swaged on when I need a needle, I use Cassette suture to ligate the pedicles and uterine stump”
Suture composition
Eighty-one veterinarians responded to the question about what suture composition they used for each surgery. Veterinarians showed a strong preference for synthetic monofilament suture for all surgery types, with all but one respondent (98.8%) using this suture type for at least some surgeries, and 75 respondents (92.6%) using only synthetic monofilament suture in all surgeries.
The one surgeon who did not use any synthetic monofilament suture used synthetic braided suture in all surgery types.
Two surgeons (2.5%) used stainless steel in cat spays; both of these veterinarians also used synthetic monofilament suture in cat spays, and one also indicated that they use chromic gut in cat spays. This surgeon commented that they used stainless steel for uterine body ligation in pediatric kittens.
Three surgeons used chromic gut suture in at least some surgeries. All three used chromic gut in dog spays; 2 used it in dog neuters, and one used it in cat spays. In all cases, veterinarians who used chromic gut in a surgery type also used synthetic monofilament suture in that surgery type. One of the surgeons who uses chromic gut in dog spays commented that they “ligate pedicles with 2 chromic gut for most dogs >40# (great knot security),” but close the abdomen with synthetic monofilament suture.
No surgeons used synthetic nonabsorbable suture in any surgery type in this survey.
Suture size
Eighty two surgeons responded to questions about their suture size preferences. For kitten spays, 33 (40.2%) used 4-0 suture while 55 (67.1%) used 3-0 suture. Some surgeons responded with both suture sizes for kittens. For adult cats, only 3 (3.7%) surgeons used 4-0 suture while 76 (92.7%) used 3-0 suture, 13 (15.9%) used 2-0 suture, and 3 (3.7%) used 0 suture. Some surgeons responded with more than one suture size for adult cat spays. Some surgeons commented that they used the larger sizes of suture specifically for uterine body ligation in the pregnant, enlarged, or diseased uterus, and smaller suture for body wall and subcutaneous closure.
In dogs, suture size preferences were more variable. For the smallest puppy spays under 10 pounds, 3-0 was preferred by 80.5% of respondents. For puppies 10-20 pounds, respondents were nearly evenly split between 3-0 and 2-0 suture. By the time puppies were over 30 pounds, 2-0 suture was preferred by most veterinarians.
For adult dog spays, suture size preferences also varied considerably, with 3-0 preferred for the smallest dogs under 10 pounds, 2-0 for those 10-40 pounds, 2-0 and 0 nearly equally selected for 40-50 pound dogs, and 0 preferred for those over 50 pounds. Some surgeons commented that they used more than one size of suture in larger dogs, with a large size suture used for ligations and body wall closure, and smaller suture selected for the subcutaneous and subcuticular closures. This accounts for the persistence of small suture sizes even in the largest dog spays.
Adult dog neuter suture size preferences were somewhat smaller than those preferred for spays. For dogs under 20 pounds, 3-0 was preferred, with 2-0 for those 20-50 pounds, 2-0 and 0 nearly equally selected for 50 pounds and up. Some surgeons commented that they used more than one size of suture in larger dogs, with a large size suture used for cord ligations, and smaller suture selected for the subcutaneous and/ or subcuticular closures and for ligation of subcutaneous bleeders. This accounts for the persistence of small suture sizes even in the largest dog neuters.
Not all veterinarians use suture on adult dog neuters. One respondent commented, “Rarely use suture, autoligate most cords and glue the scrotum. Only do ligatures on very large cords, only suture very pendulous scrotums.”
Discussion
Instrument preferences
Certain instrument preferences are identifiable within this data. A large majority of veterinarians chose Olsen Hegar¹needle holders over Mayo Hegars. Olsen Hegars allow increased efficiency by allowing the surgeon to cut suture ends after knot tying without requiring them to exchange needle holders for scissors. While there is some risk with Olsen Hegar needle holders of inadvertently cutting suture while attempting to grasp, this consequence may be reduced with attention and practice. In addition, since spay and neuter surgeries do not require suturing in deep cavities, it is less likely that suture will be inadvertently cut, as this occurs most often when visibility is poor and when suturing in a restricted space.
Fewer than half of the surgery packs contained scalpel blade handles. While it has been suggested that use of blades on scalpel handles is safer than using unattached blades, other literature suggests that about 10% of scalpel injuries occur during disassembly of the blade from the handle. Spay neuter veterinarians may choose to eliminate scalpel handles from their packs due to the additional time required to assemble and disassemble the blade and handle, and the ability to make smaller and quicker movements with the blade alone than with the blade with handle. Disadvantages of using unattached scalpel blades could include the increased likelihood of losing track of the blade within the surgery field and potential injury due to lack of visualization of the blade, or due to the blade slipping in the fingers.
Towel clamps were present in about half of the packs, and were more likely to appear in dog spay packs than in other packs. In all surgery pack types, towel clamps were more likely to be included in packs with paper drapes compared to cloth drapes. This suggests that the draping qualities of cloth drapes allow these drapes to remain in place more readily without clamping, whereas the stiffer, less-conforming nature of paper drapes means that veterinarians are more likely to choose to use towel clamps. In addition, some veterinarians or clinics may choose not to use towel clamps on cloth drapes in order to avoid damaging the reusable cloth and shortening the life of the drape material.
Surgery pack sizes and contents varied considerably. For clinics with many surgery packs, the expense of purchasing larger packs and the labor required to reprocess the larger number of instruments could both be substantial. For clinics purchasing or assembling new packs, it might be worth considering assembling smaller packs and providing separately wrapped and sterilized additional instruments for use when needed, rather than including greater numbers of instruments in each pack.
Sutures
The use of cassette suture by nearly half of the respondents may have been a nod to economy, but also would have facilitated the use of different suture sizes in different parts of the surgery or different layers of the closure. Surgeons may be hesitant to open a new package of suture simply to place one or two ligatures or appositional sutures, but may be more willing to do so when a small amount of suture can be removed from a cassette for that purpose. The respondents who use both cassette and swaged-on suture may also be taking advantage of this multi-size strategy by using cassette suture for ligations, where no needle is needed, and swaged suture for locations where suturing with a needle is required.
Suture type selection was unsurprising, with most respondents preferring synthetic monofilament absorbable suture throughout their surgeries. Since no surgeons indicated the use of nonabsorbable synthetic suture, it can be inferred that none are placing external skin sutures in their spay and neuter patients. This may be different from the private practice setting, where patients may be expected to return to the veterinary clinic for skin suture removal, a practice which may be impractical or impossible in the HQHVSN setting.
Limitations
This survey only asked about instrument and suture preferences. While it is possible to make some inferences about technique from the choices of instrument and suture and from comments left by respondents, it is not truly possible to know from these questions what techniques HQHVSN vets are actually using. This information would be interesting but was beyond the scope of this study.
The survey respondents were self-selected and consisted of veterinarians who use electronic means (Yahoo group or Facebook group) to connect with other veterinarians in shelter or spay neuter practice. These veterinarians may or may not be typical of veterinarians in these types of practice– thus, the results may not be reflective or representative of all spay neuter practice. Furthermore, responding veterinarians may be using packs and suture types which have been selected by others (practice managers, previous veterinarians) and which do not necessarily reflect their own preferences.
Conclusion
Surgical instruments and suture are an important factor in the physical ergonomics of surgery and represent the interface between veterinarian and patient. Selection of these tools will affect the efficiency, comfort, and performance of the surgeons who use them. This survey demonstrated some areas of consistency among surgeons, as well as substantial variability in other areas, but I hope that at least some clinics and veterinarians find this information useful.
Footnote
Bushby calls the Olsen Hegar needle holder a “spork.” I think this is really funny and accurate, despite my love for my Olsen Hegars.
No tropical beaches during my “vacation” – just good old Vermont mud season.
As I prepare to go back to work tomorrow after my 20-day “surgical vacation” (see here for why I needed a surgical vacation), I have been reminded of one of the reasons I first became interested in human factors and ergonomics in veterinary practice: our willingness to work while physically injured or unwell. Eleven years ago I was talking to a vet who bemoaned the fact that the technicians and schedulers at the spay neuter clinic where she worked weren’t taking into account that her surgery speeds were slower because she had broken her arm only the week before and was working with a cast on her arm. I was in awe at her toughness, but then recalled working the previous fall with a broken finger (just a small fracture of an extensor process, and just my fourth finger, not an “important” one), and two years later thought little of returning to work the week after my own hip fracture.
There are plenty of good reasons for our tendency to work through injury and physical compromise. Whether in spay/neuter, shelter, or general practice, many of us work in small practices as the only veterinarian, or one of only a few veterinarians. Missing work due to injury or illness only means more work upon return, disappointed clients, patients left untreated, and loss of revenue (for the practice, and often for the individual as well). We often have little or no provision to cover for our absences, so we feel pressured to come back.
One interesting study found lower rates of musculoskeletal discomfort but higher rates of missed work due to discomfort among veterinarians working in regulatory practice compared with clinical practice—perhaps a reflection, as much as anything, on their ability to get coverage and financial compensation during their absence.
It can be boring sitting at home recovering, unless you have a Cat Butt Coloring Book and a mystery novel.
Our tendency to work while injured or physically compromised combines nicely with our tendency to self-treat (see here and here). A 1988 study on veterinarians and trauma states: “Self-treatment of injuries was common. Four per cent of veterinarians reduced their own fractures and dislocations, 20% sutured their own lacerations, and 67.5% self-administered antibiotics.” In instances of bite wounds, this self-treatment may lead to greater complications; as far as I can find, the consequences of veterinarian self-treatment for other injuries hasn’t been studied.
In my current case, of course, self-treatment wasn’t an issue or an option (though I did have more than one spay-neuter veterinarian suggest that they should have been the one to perform my initial hysterectomy surgery).
In any case, I’m fortunate because, other than a 4-week restriction against lifting, I am physically capable and ready for my return. I was able to schedule the time off that I needed to heal and didn’t need to push myself to go back as soon as I could walk or drive. Now, it’s time to get back to work!
For those of you who are curious, my own surgery on April 10th was a ureter reimplantation surgery with a psoas hitch. For a do-it-yourself, detailed description of the surgery and some useful illustrations of the psoas hitch, see this paper. Basically, in order to prevent tension on the new connection between the healthy part of the damaged ureter and the bladder, the surgeon tacks the bladder to a nearby hip flexor located along the spine. What results is a bladder that slants to the side of the injury.
Psoas hitch illustration from the paper Stein, Raimund, et al. “Psoas hitch and Boari flap ureteroneocystostomy.” BJU international 112.1 (2013): 137-155.
Several days after surgery, once I started moving around more, I could feel the pull and soreness of my psoas muscle, especially when I made a big step up with my left leg or put my left leg across my knee to put on a sock or tie a shoe. The feeling of having a strained muscle is still there a bit, but much less than it was a couple weeks ago.
A pikachu visits me in the recovery ward. I don’t think the nurses saw her.
I stayed in the hospital for 3 nights, which was a day longer than expected, but with my mild postoperative anemia and my wife showing the first symptoms of what turned out to be a case of anaplasmosis on the same day as my surgery, it seemed wise to spend the extra night. (Never fear, a quick diagnosis and the wonders of doxycycline made quick work of the tick borne menace).
My Foley catheter was removed 10 days post-op, after a cystogram showed no bladder leaks, so now, for the first time since January, I no longer have to carry around a bag of my own urine. Small victories…
In order to find pictures to demonstrate surgical posture, I went again to Google images to find some pictures of spaying and neutering, and came across several with surgeons in what appeared to be uncomfortable and ergonomically risky postures. Here are a couple of photos that I found:
Both of these pictures show trainee surgeons leaning over their patients with about a 90 degree neck angle, bent waists, and elevated shoulders. We can’t know if these surgeons are using their bodies in this way because of the way their surgery room is set up, or because of habit, apprehension, or unawareness of their posture– or all of the above. Maybe these are brief positions during the surgery – but if these postures are sustained through a surgery day, these individuals are likely to experience some pain as a result.
In small animal surgery, we can achieve a fairly neutral posture except for our neck position. A neutral neck position would involve flexion of less than 10 degrees, but for a surgeon it is often 20-30 degrees. In this picture, I have a neck angle approaching 40 degrees.
It may not be possible to avoid extreme neck flexion in this work, and the important thing will be getting out of this posture between surgeries to allow those muscles to release and stretch. Turning your neck to each side, rolling your head, extending your neck, and shrugging your shoulders are all ways to release the tension in the muscles around your neck.
Other surgical postures to watch out for can be twisted or asymmetrical postures. If a surgeon maintains an asymmetrical or twisted posture, that can lead to uneven muscle use and strain and discomfort at the end of the day.
However, varying position during the surgery day is a good thing. If this surgeon balances the twist in one direction over time with a twist in the other direction, then she may not experience strain from the posture.
In this case, this surgeon might be more comfortable with a foot stool to rest her foot on, rather than using her weight-bearing foot as a footrest.
Another important thing you can do for yourself is to moveduring the surgery day. Between surgeries, take a few seconds to change your position. Roll your neck and shoulders, stretch. walk a few steps.
A study on human surgeons (abstract here) showed that taking a 20 second break every 20 minutes can increase your comfort and decrease fatigue after a day of surgery, and it can sustain your surgical performance and accuracy better through the surgery day. (If you can get access to the article, it’s a fun read not just for the scientific finding but also for the authors’ wry humor).
We are fortunate in spay neuter that we have short-enough surgery times that we can use the end of each surgery as a cue to move a little. We aren’t doing hours-long surgeries where we would need to set an alarm to remind us to move (although if you are someone who does long-duration surgeries, setting an alarm could be a good way to remind yourself to take your 20-second stretch break). So take a moment when you switch from one surgery to the next, to break the muscular tension that you hold during surgery.
We don’t necessarily think of or talk about spay neuter surgery as a sport or an activity that requires physical fitness or work hardening, but it does. As you do this work, your ligaments adapt, if you give them the recovery time they need between use.
Ligaments adapt to exercise and use by increasing size, strength, and collagen content (given adequate rest and recovery time between uses)
Surgeons in regular work may have greater resilience due to this tissue adaptation
New HQHVSN surgeons (or those returning from an extended break such as a maternity leave) will not have the ligament strength and may be at greater risk for hand/ wrist injury and discomfort.
Consider having a lighter schedule for new/ returning surgeons to allow their bodies to become conditioned to the work. Gradual increases in work hours, rather than starting off with a full-time schedule, may be more likely to lead to well-adapted ligaments rather than injury and strain.
For a much more in-depth discussion of ligament physiology, check out Ligaments: A source of musculoskeletal disorders. If this link isn’t available (it is not from the original publisher’s site), you can find other versions posted on Google Scholar.
Solomonow M. Ligaments: a source of musculoskeletal disorders. Journal of bodywork and movement therapies 2009;13:136-154.
Finally, physical activity outside of work is important to reducing physical discomfort while at work.
Physical activity outside of work is known to be associated with lower prevalence of pain
Surgeons who are physically active experience less fatigue due to work
For people experiencing low back pain, maintaining daily activities as much as possible is associated with quicker recovery from symptoms
Staying physically fit, maintaining friendships outside of work, eating well, and maintaining a work-life balance are all ways to reduce work-related musculoskeletal discomfort and stress.
There are not specific activities or exercises that research says are “best” – and it will likely vary between individuals– the key is simply being active and moving.
I hope this series of posts about surgical ergonomics has given you some ideas of how you might improve your own comfort during surgery. Remember that taking videos or photos of yourself during surgery can be a great way to understand what you are doing with your body, and to start to make improvements.
Let me know what works and what doesn’t work for you, and make comments with questions and with your own experiences of surgical ergonomics.
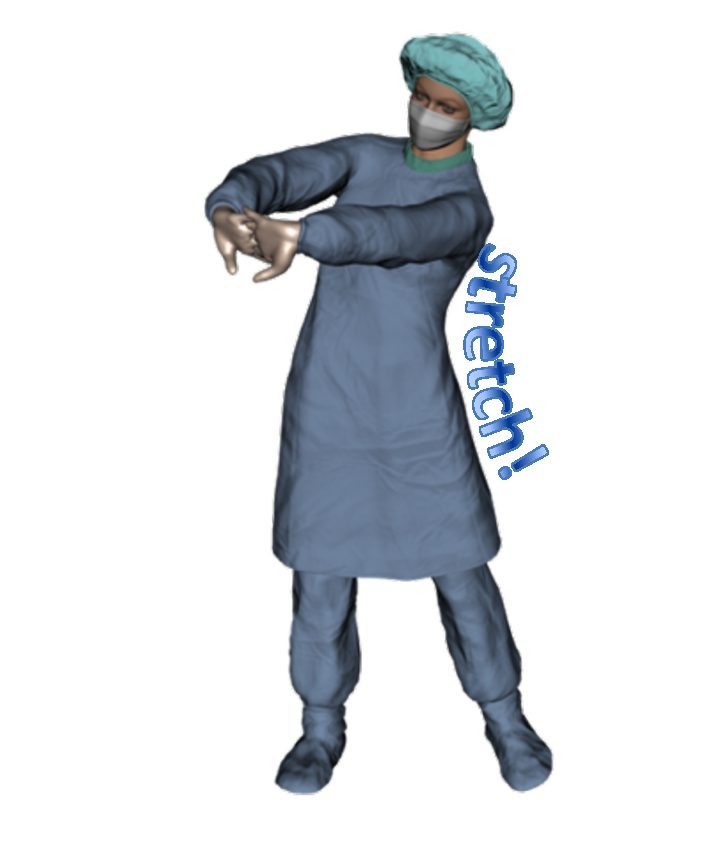


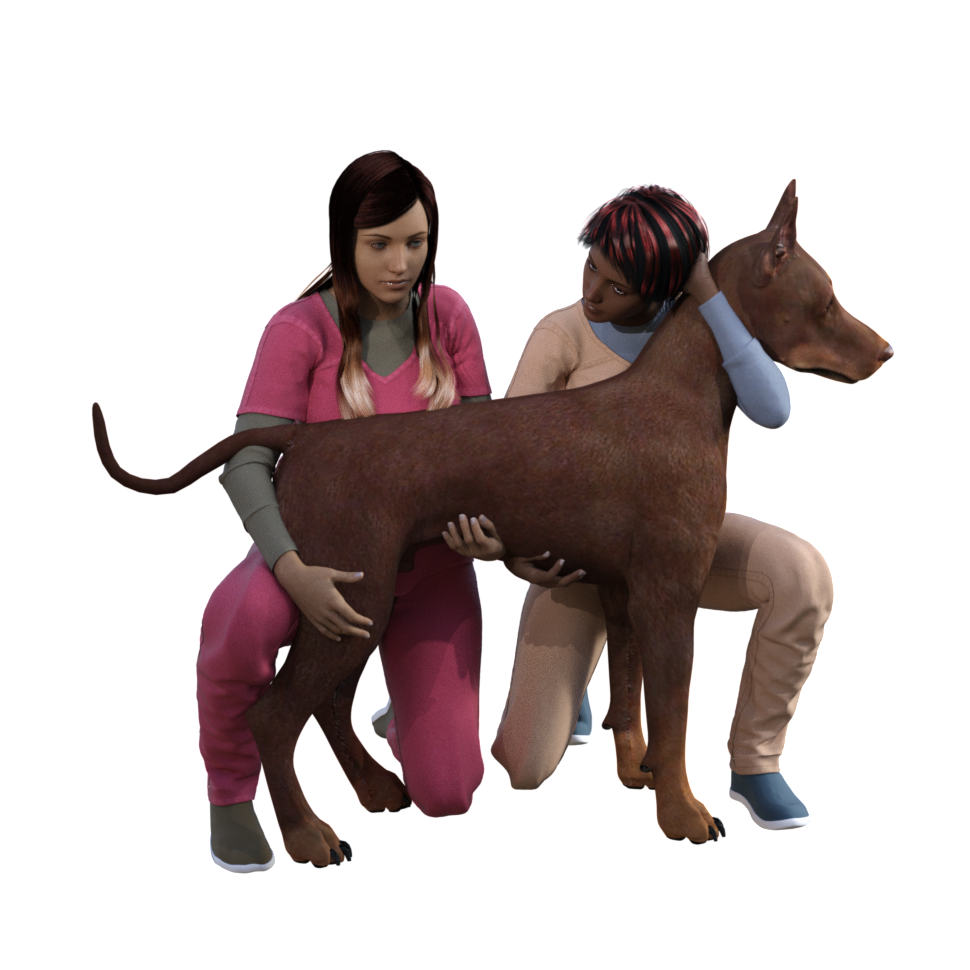
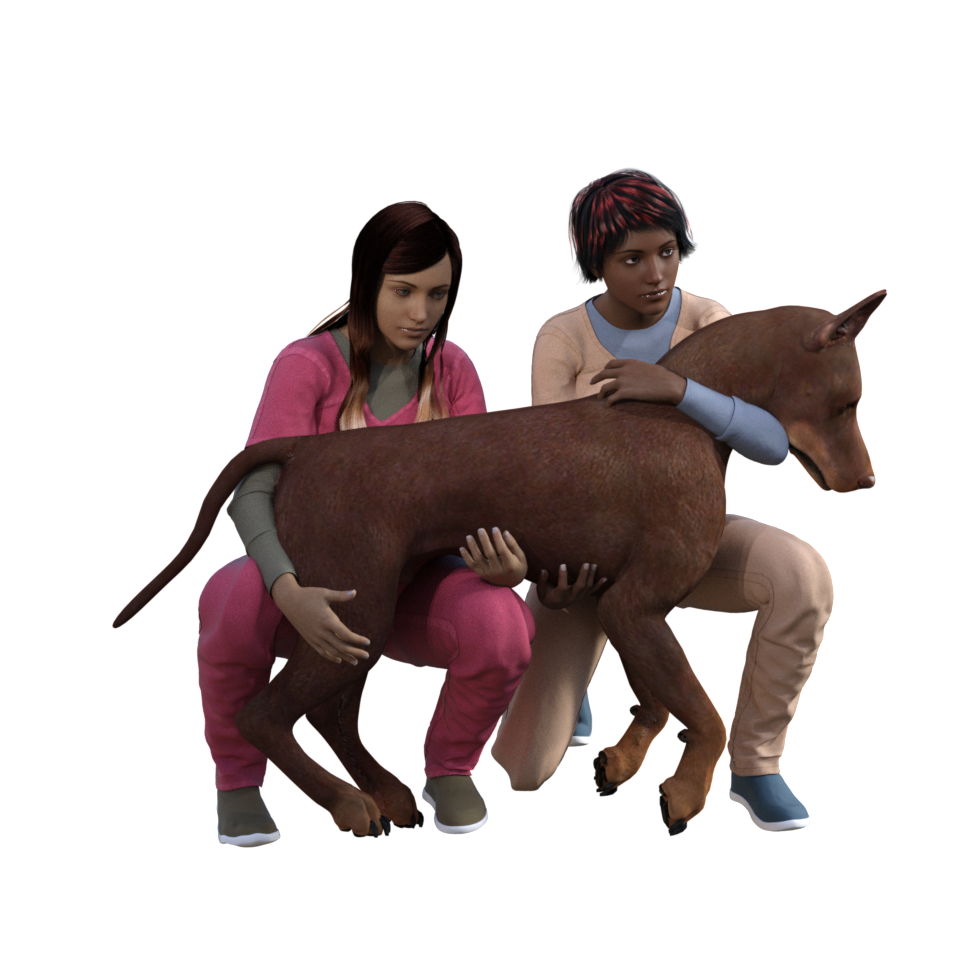

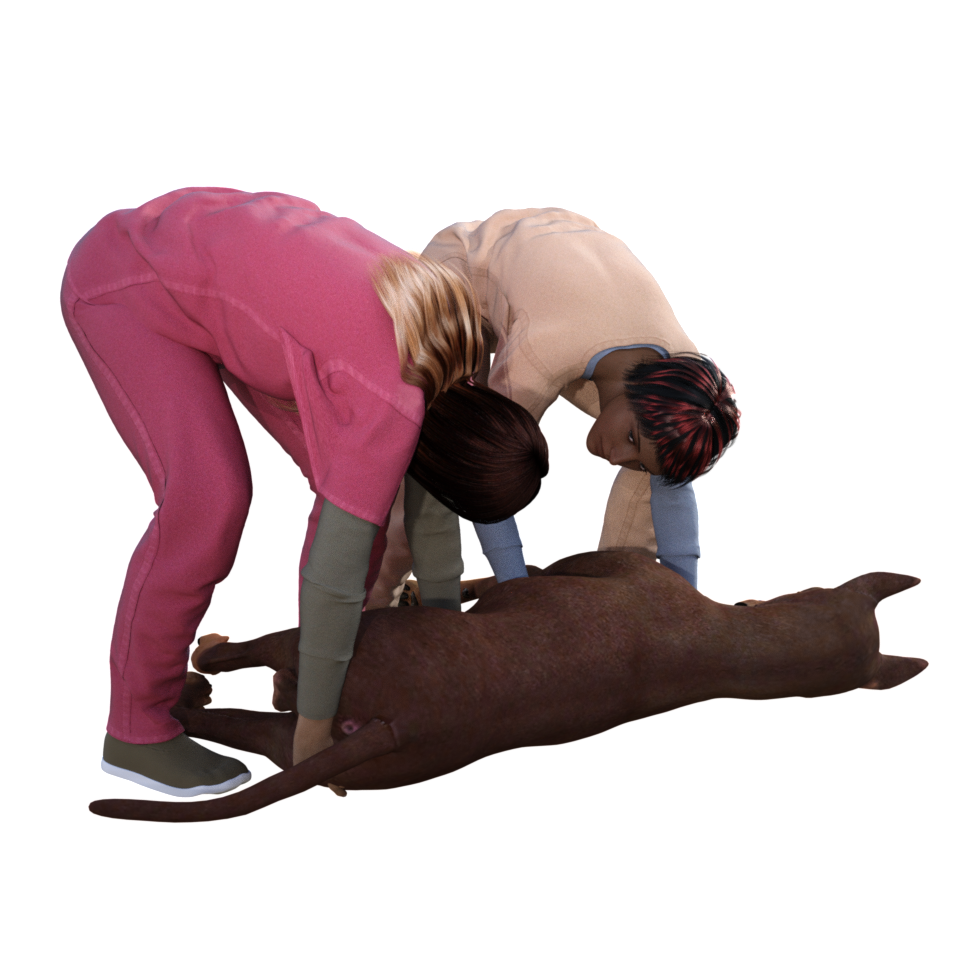


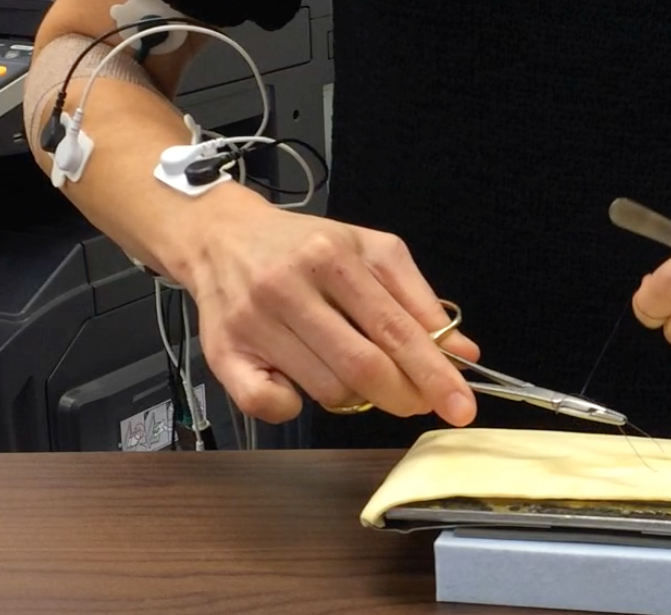
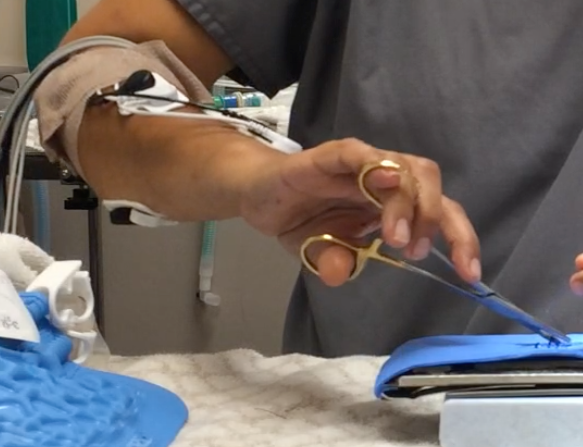
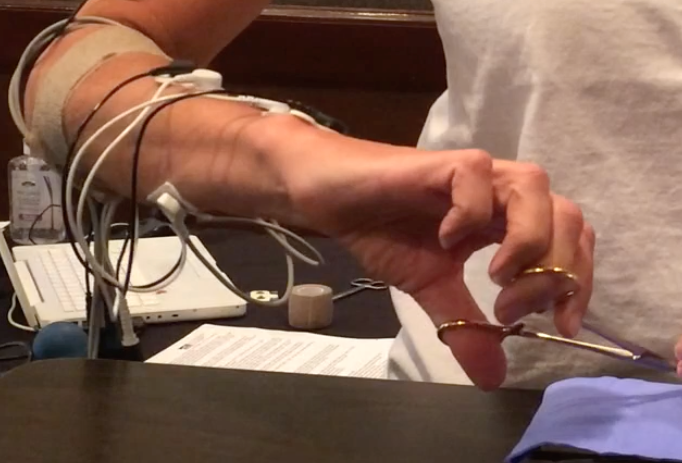
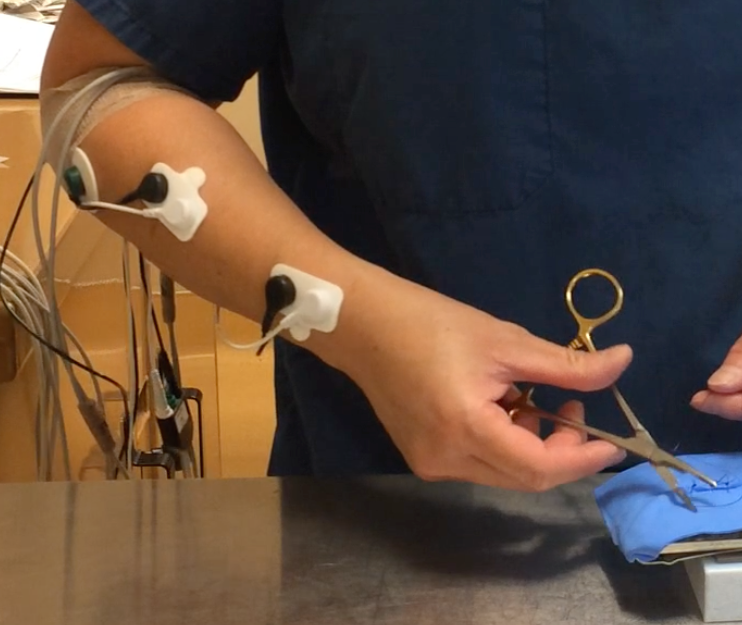
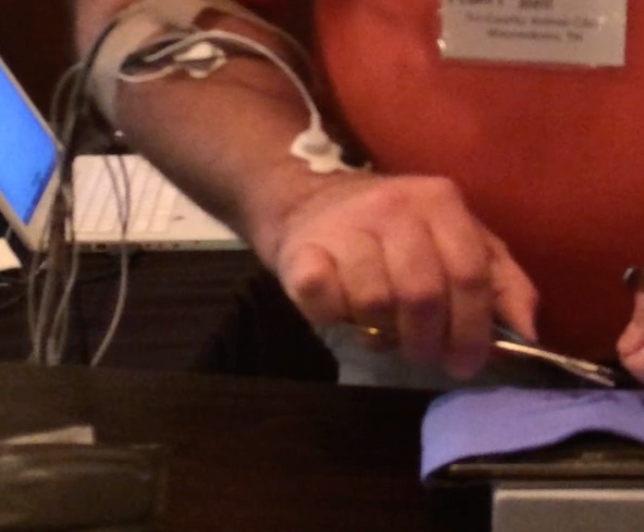


 It may not be possible to avoid extreme neck flexion in this work, and the important thing will be getting out of this posture between surgeries to allow those muscles to release and stretch. Turning your neck to each side, rolling your head, extending your neck, and shrugging your shoulders are all ways to release the tension in the muscles around your neck.
 However, varying position during the surgery day is a good thing. If this surgeon balances the twist in one direction over time with a twist in the other direction, then she may not experience strain from the posture.